User Guide V1
Login
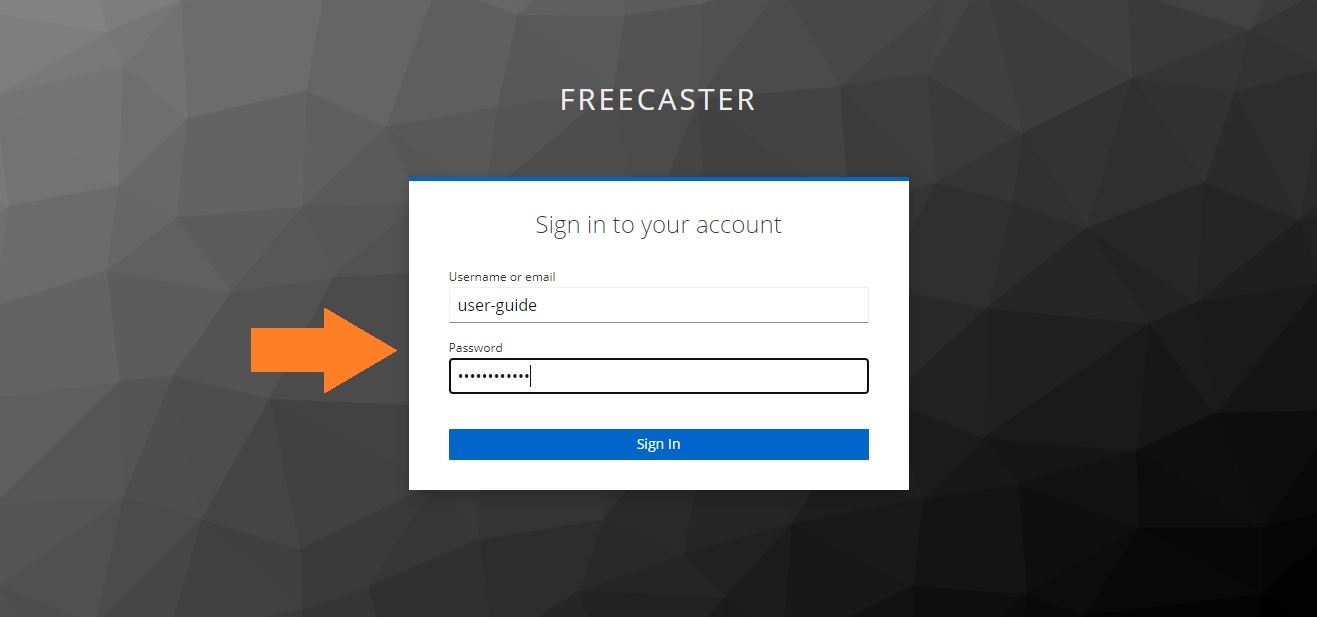 To log in, enter a valid user name or email, and its password. The user must have the cockpit role to access the platform.
Create a user
To create a new user on the platform, you need to have the Users role assigned to your account.
Info
If you don’t have this role, contact your administrator to request the proper access.
When your organization subscribes to the platform, a dedicated tenant (main channel) and its initial admin user are created with the help of our support team during the onboarding process.
Notice
A tenant is a top-level channel tied to your organization. It acts as the default channel users log into.
Steps to Create a User
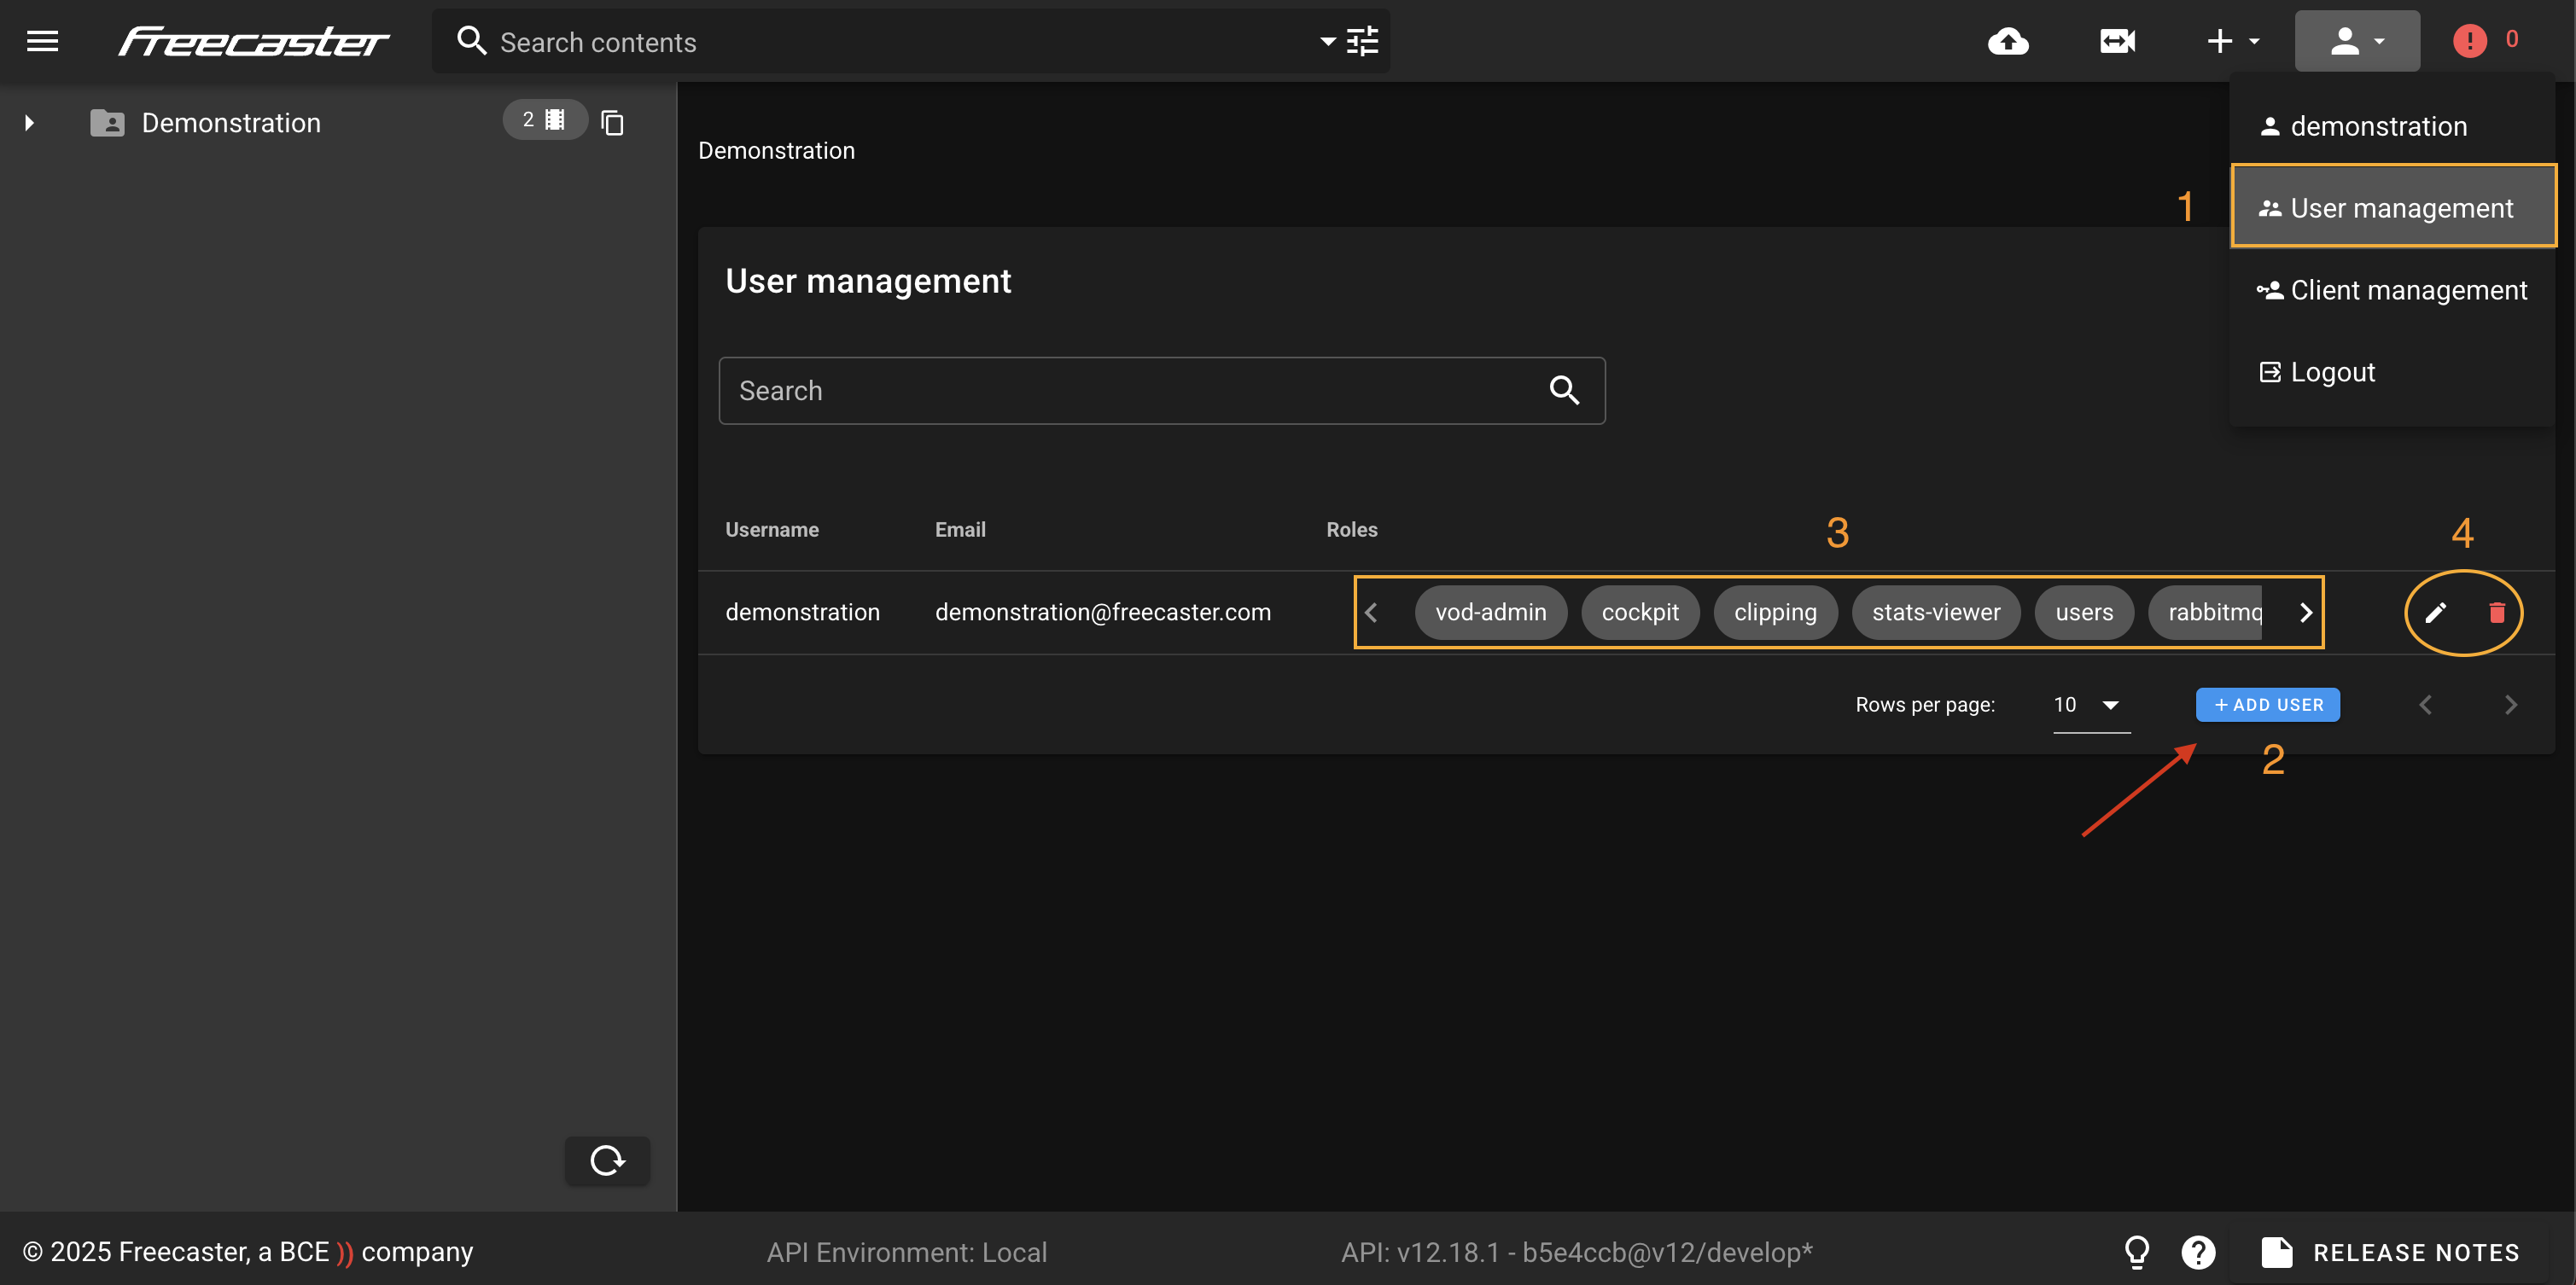
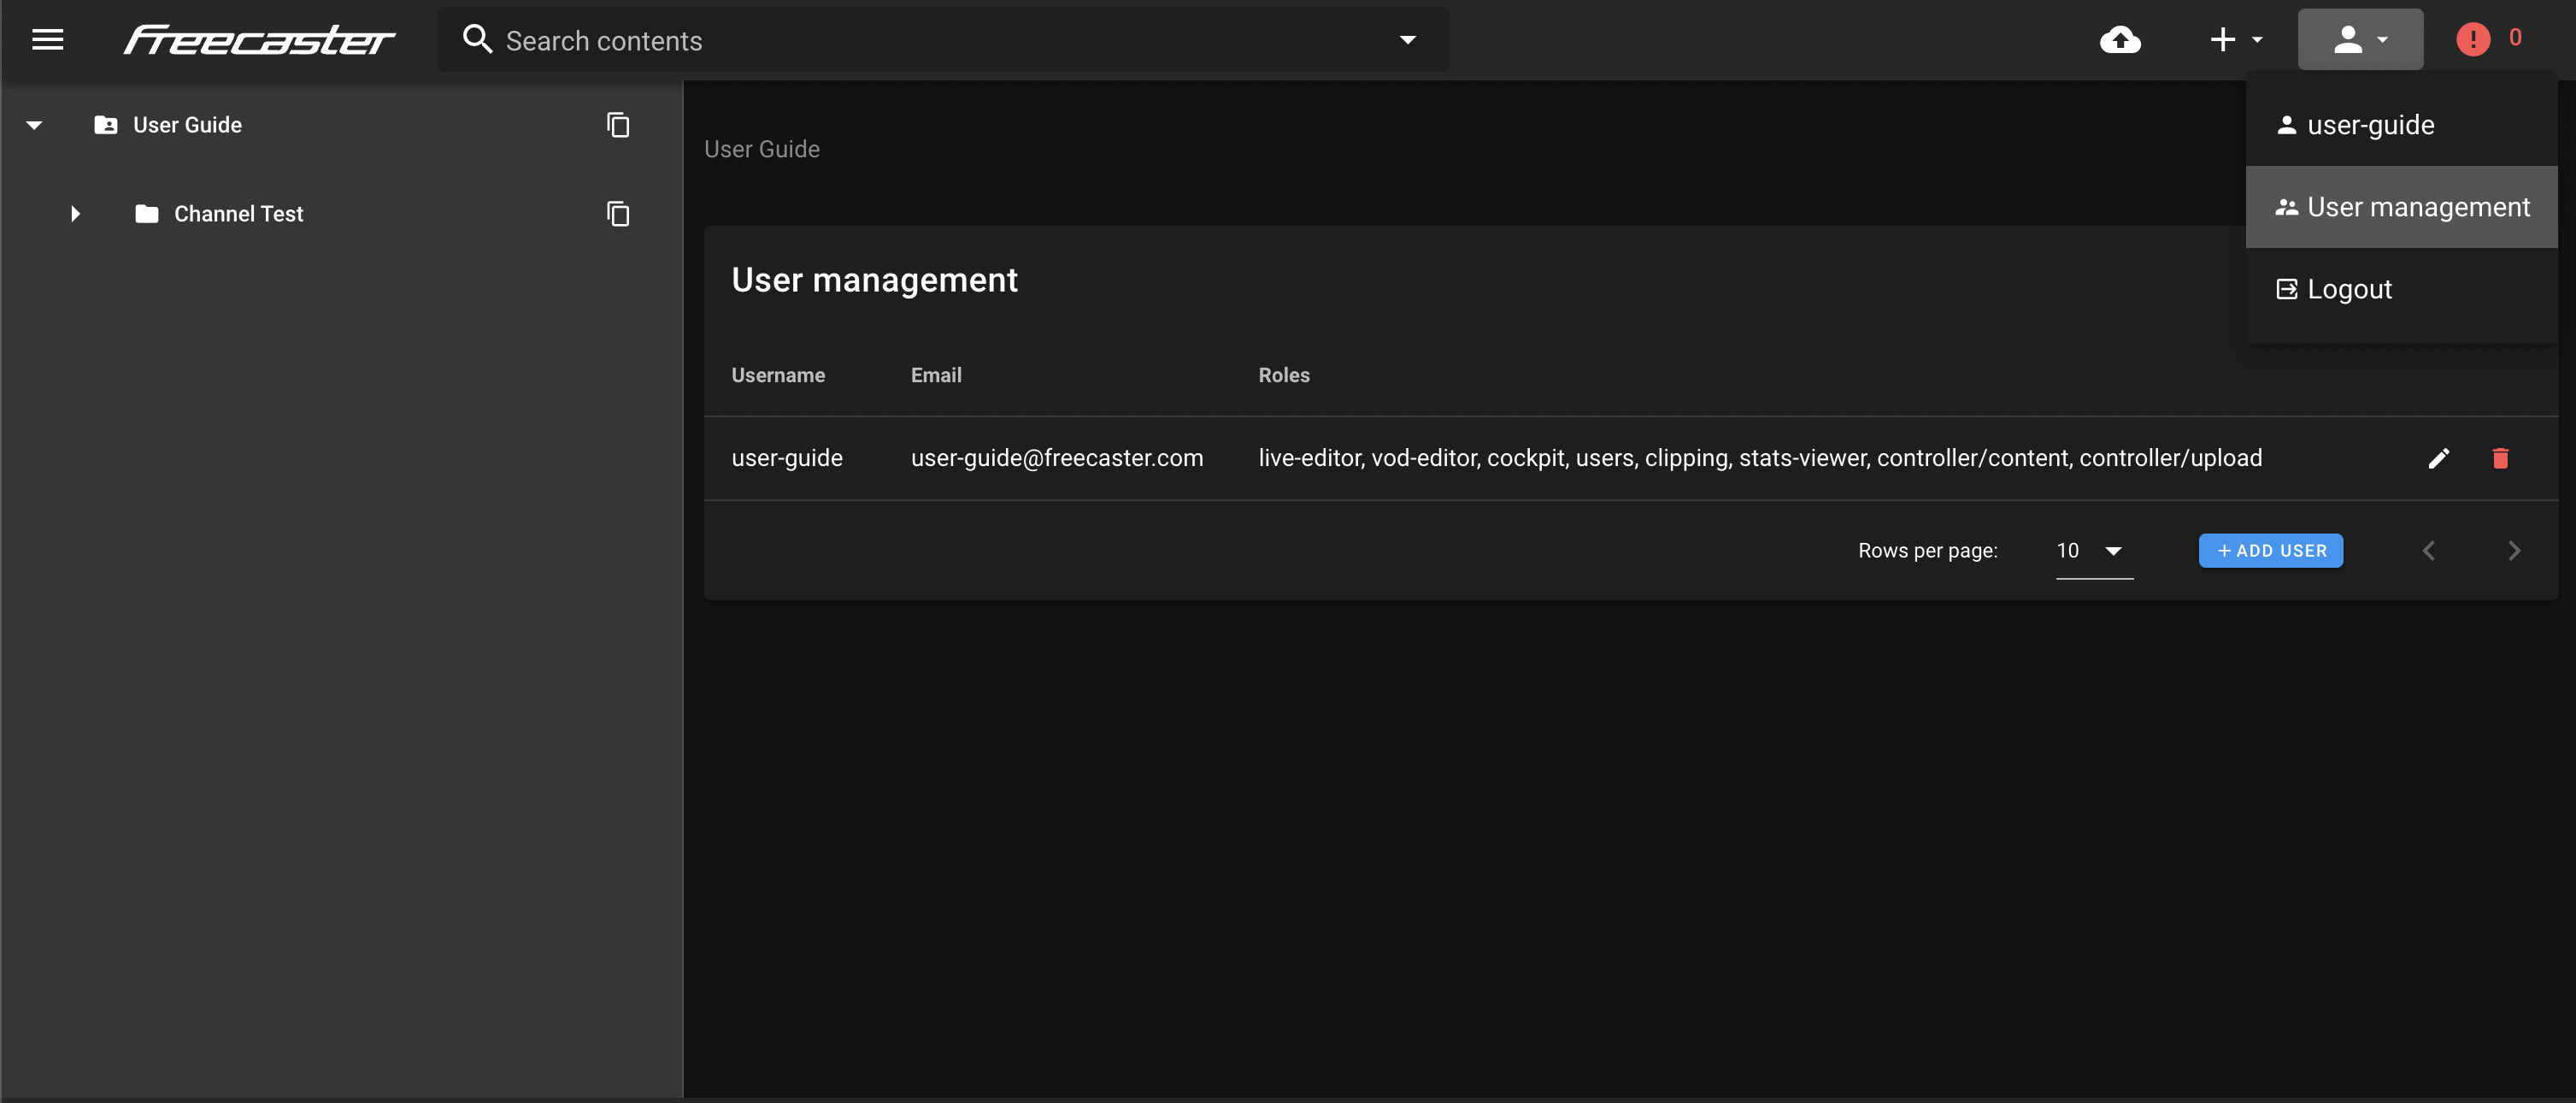
- If you have the Users role, the User User Management option will appear in the top menu.
- Once on the User management page, you will see the list of users with their name, email and roles.
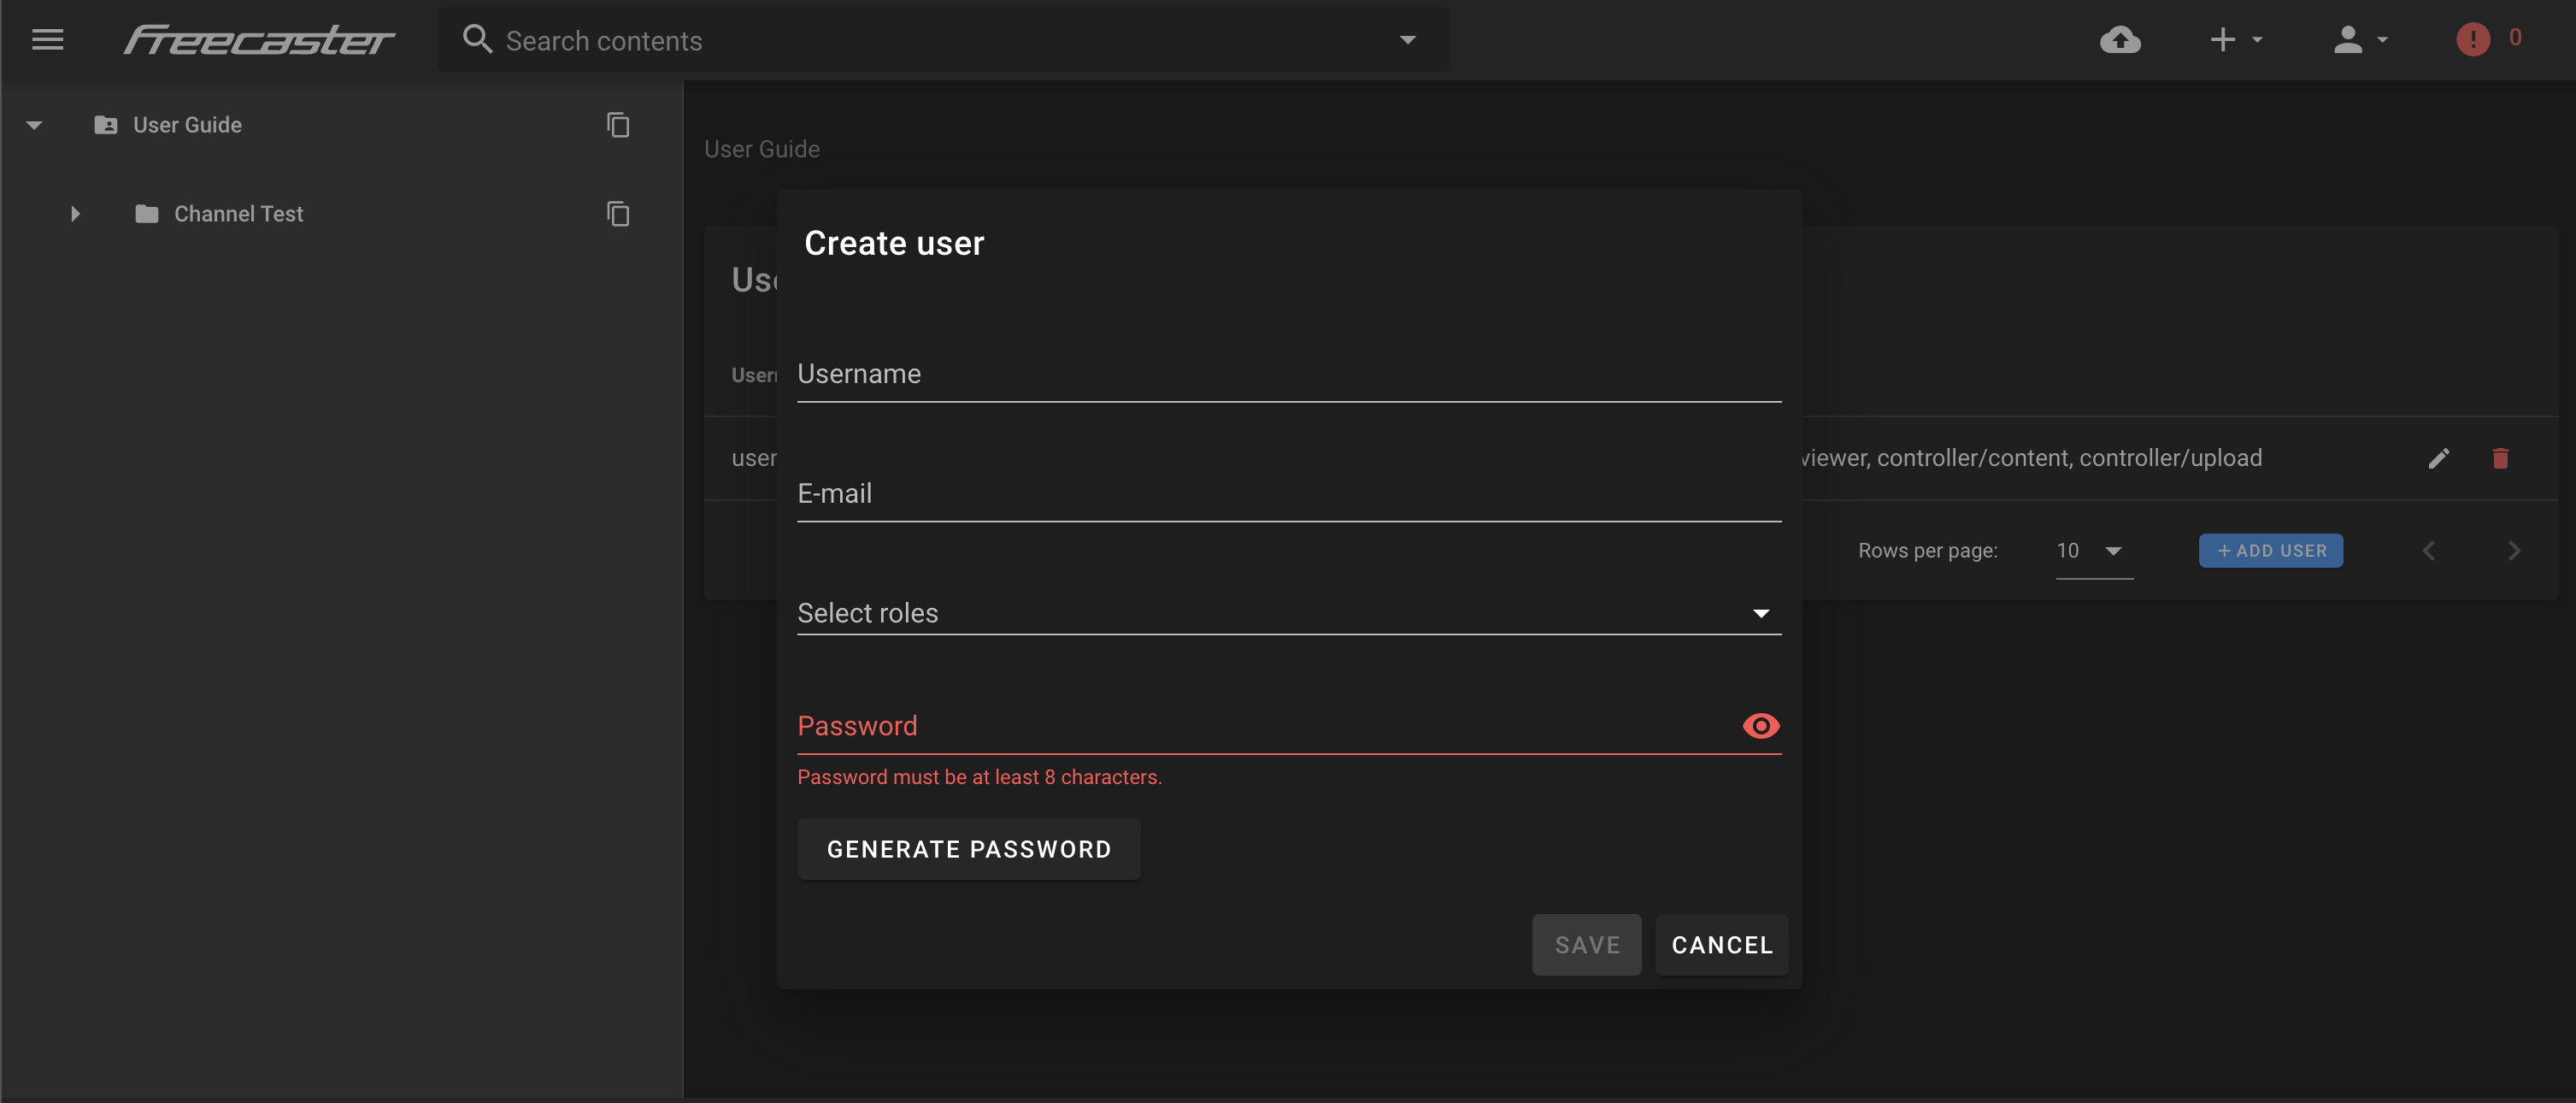
- Click "+ ADD USER" to create a new account.

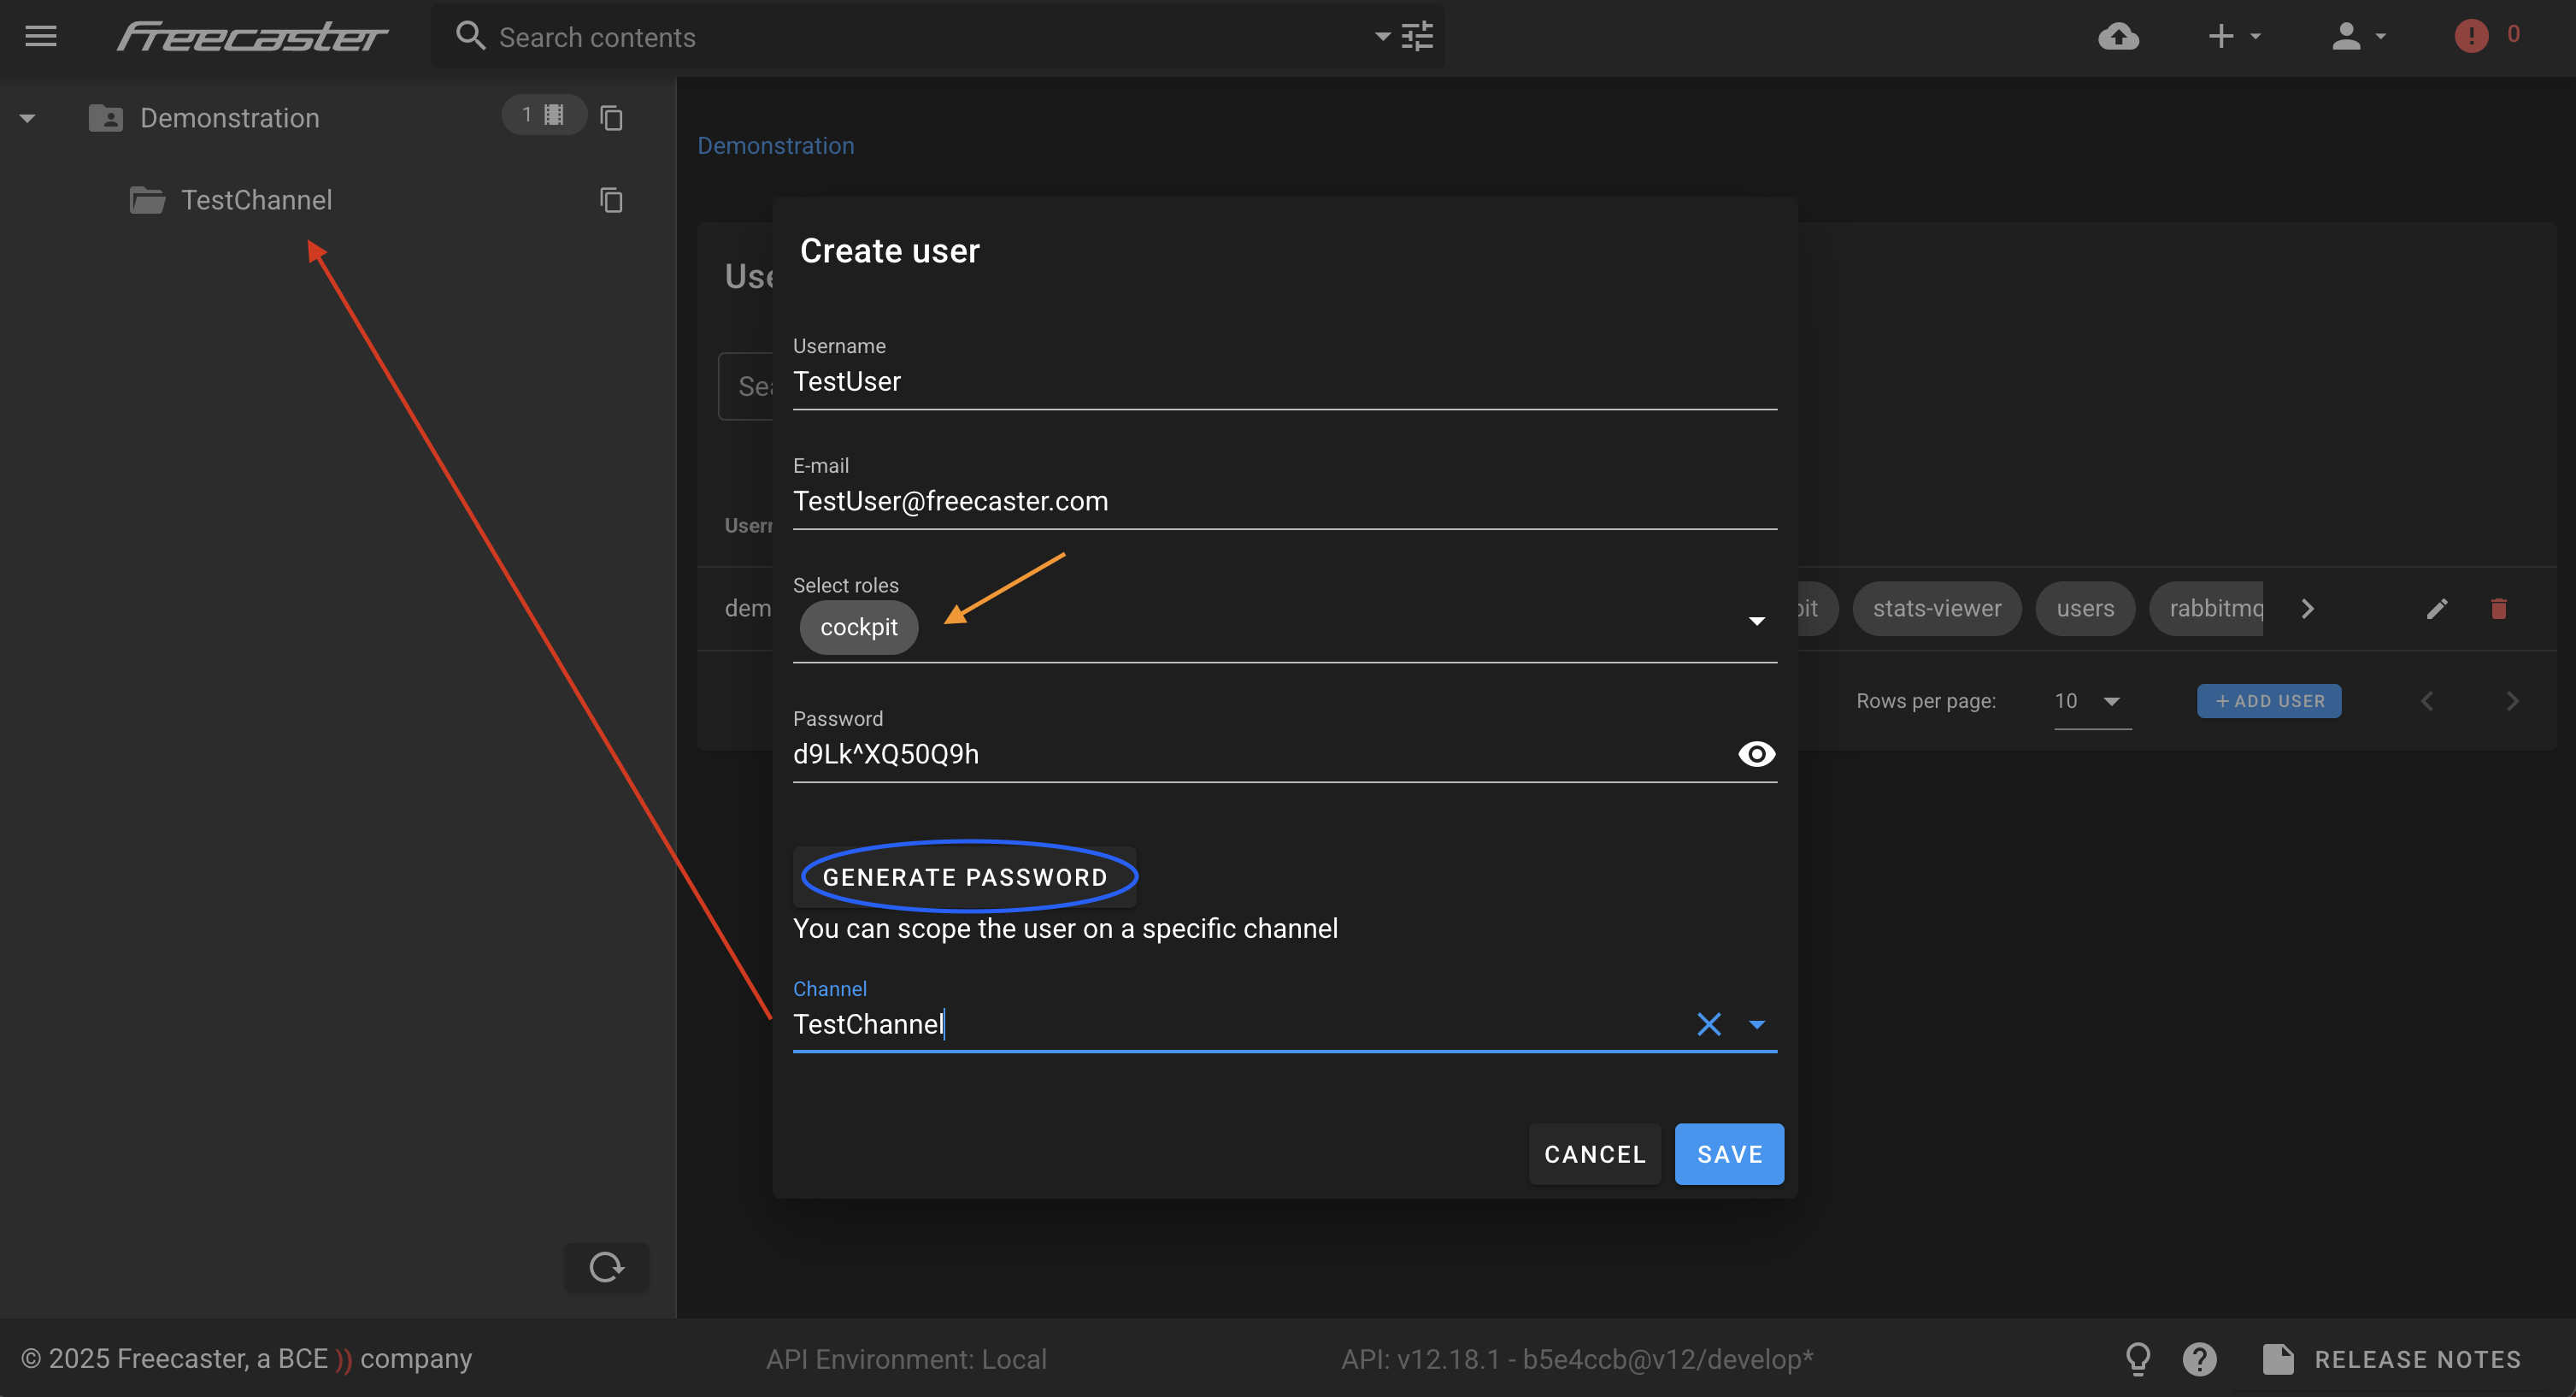
- Fill in the user's information, assign one or more roles, and generate a secure password using the provided button.
- After saving, the newly created user will be able to log in.
- You can modify the roles of a user in the list by clicking on the Select roles menu.
- Use the options on the right side of each row to edit or delete a user.
Warning
To be able to access the platform, a user must have the cockpit role.
Warning
If you need the new user to be limited to a subchannel, you can create it and assign it during user creation, or directly assign the user to an existing subchannel in the creation form.
New users created this way will be able to log in the same channel as the user used to create them.
Create a channel
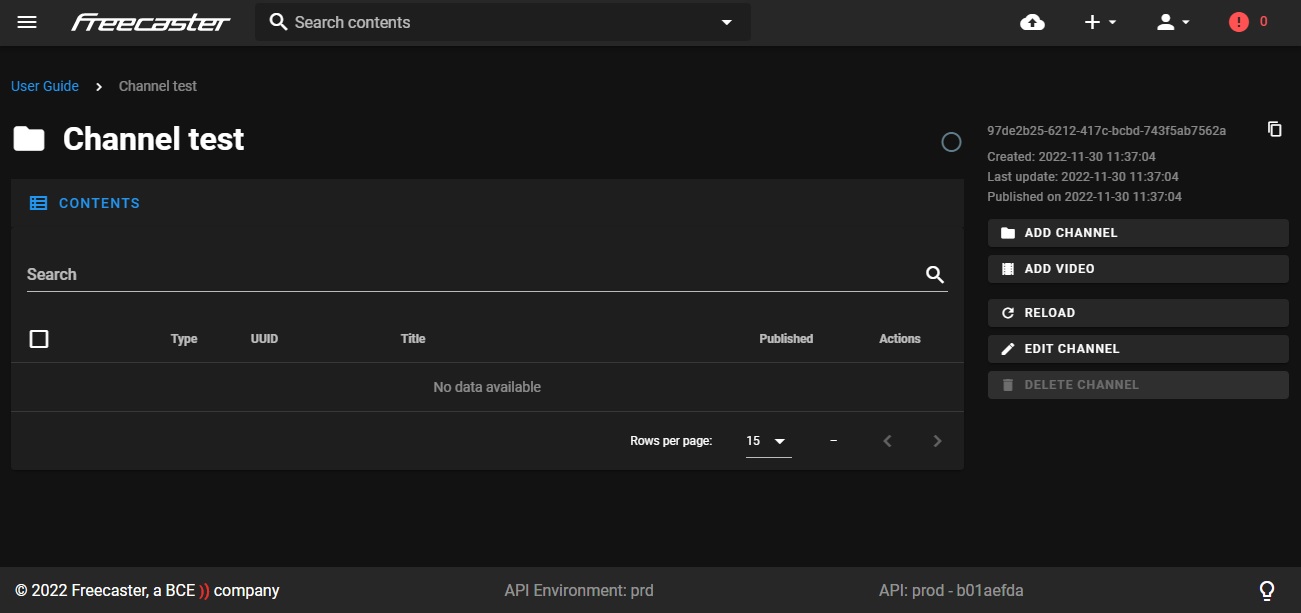
You can create a new channel either from the top menu or directly from within an existing channel page by clicking "ADD CHANNEL".
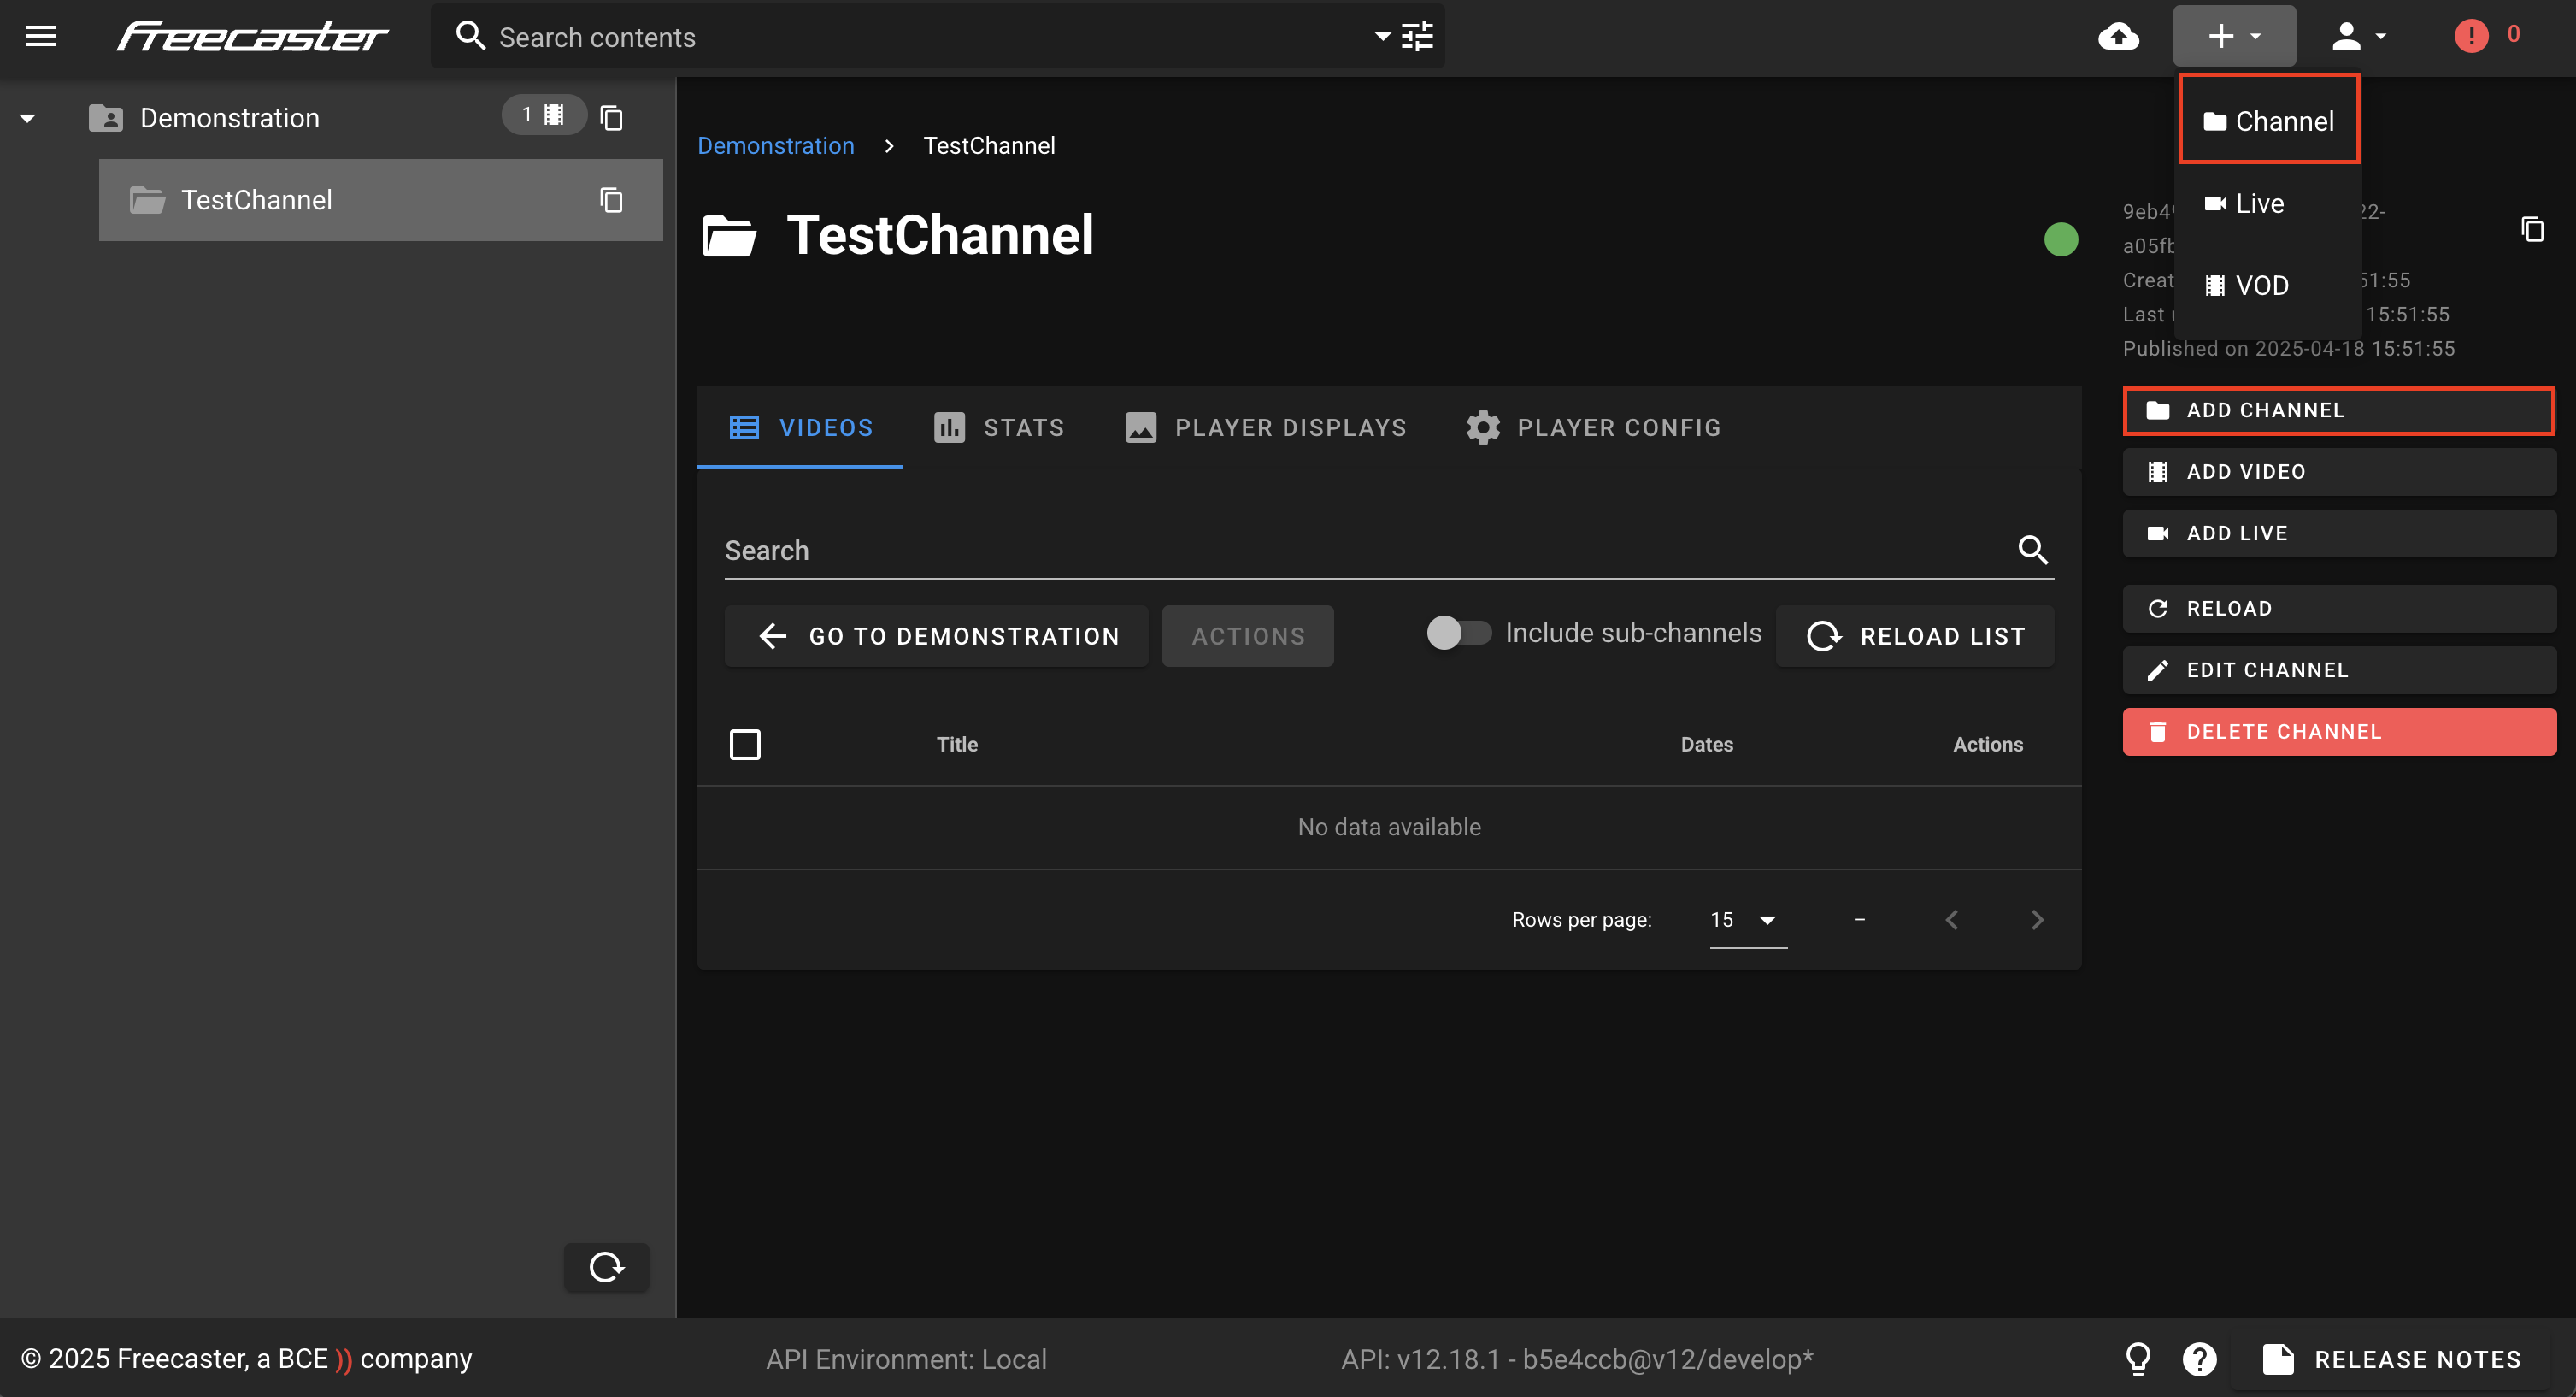
By default, the new channel will be created under the current channel as its parent. If you're not on a channel page, it will take your root channel by default.
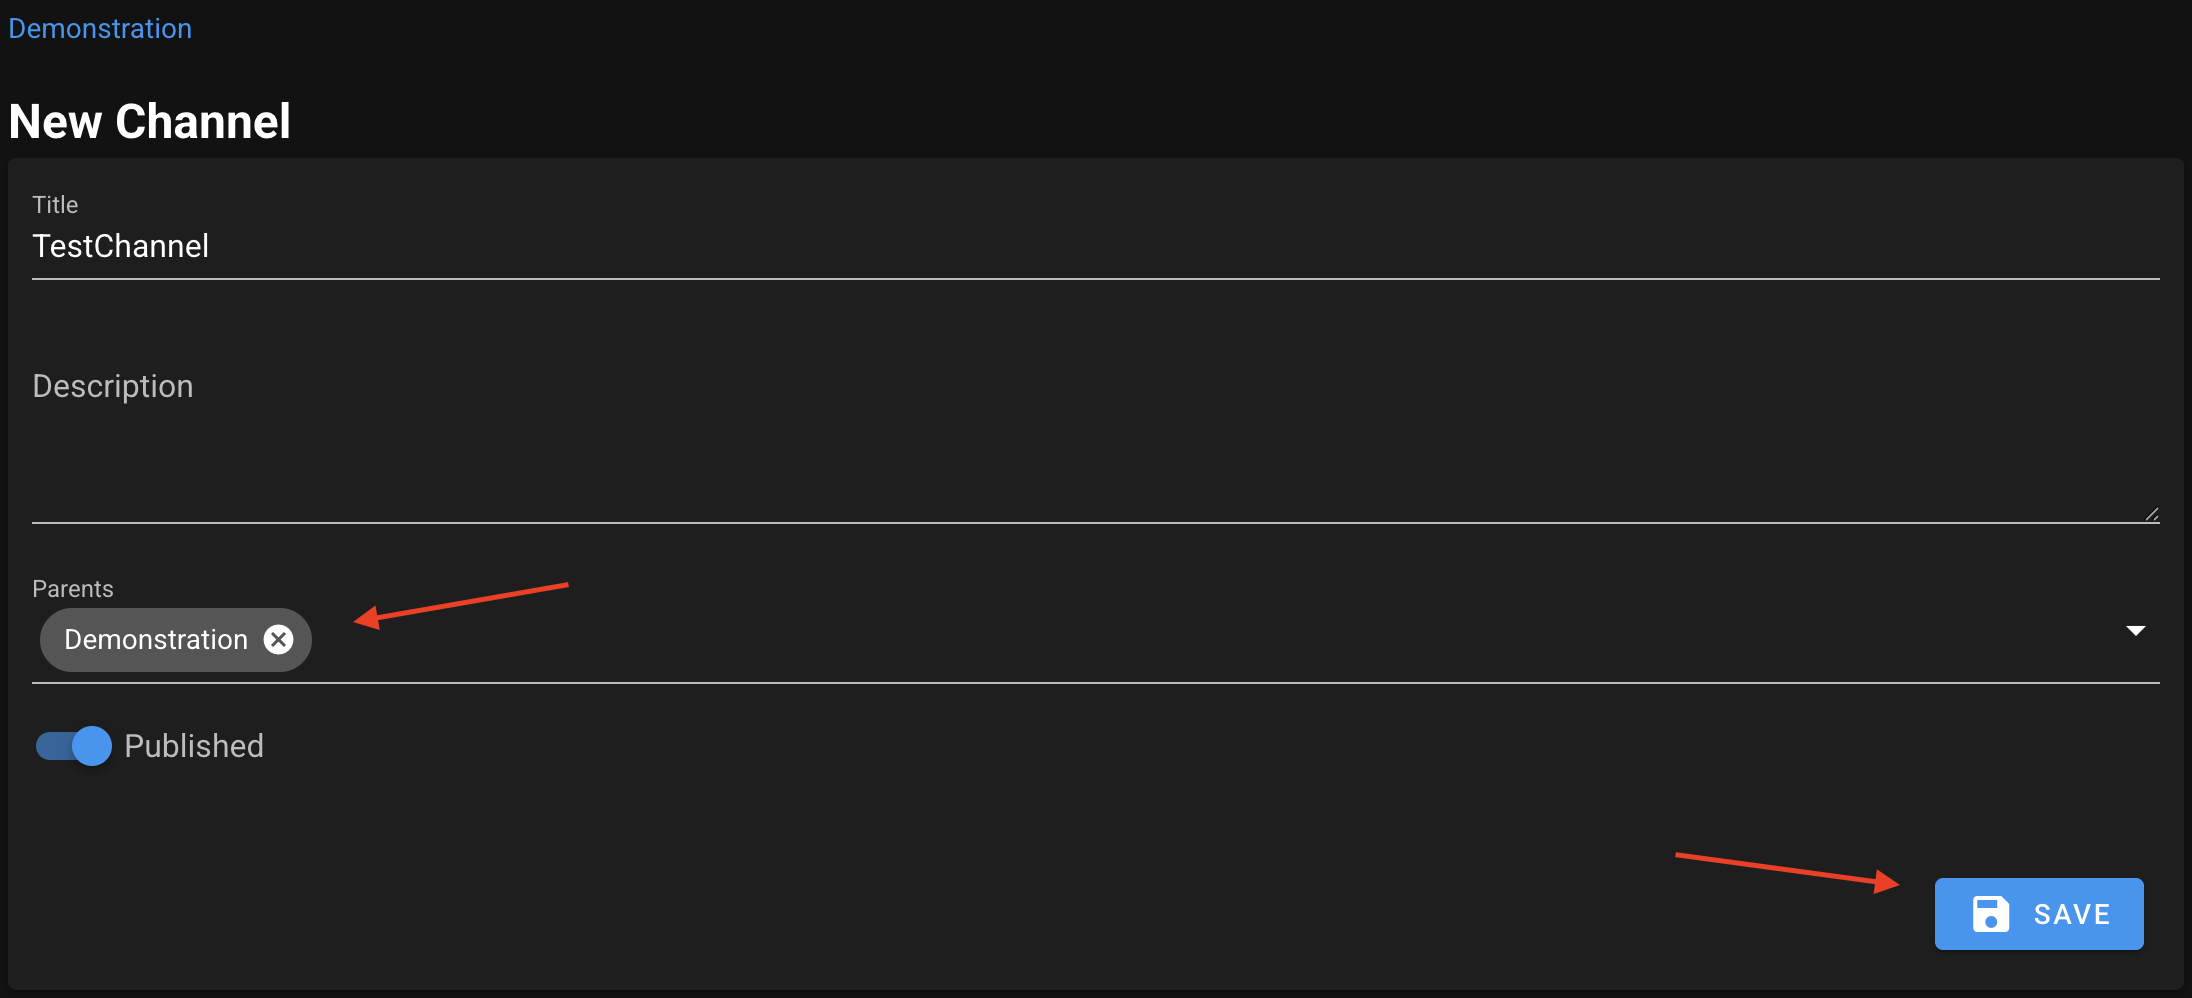
- Title & Description : Visible in the channel page, and serve to identify and describe the channel.
- Parent : Allows to set the parent under which the new channel will be created. Already has a parent set by default but you can change this using a dropdown list.
- Published : If ON, allows videos and content to be visible out of the platform (e.g., embedded). If OFF, the channel and the content will remain private.
- This setting can also be controlled at the individual content level.
Click "Save" to create the channel. It will appear under its parent on the left-side panel, and you will be automatically redirected to its page.
Notice
You can edit these parameters with the "EDIT CHANNEL" button on the channel page.
Upload a video
- You can simply drag and drop the video.
- You can use the "cloud" icon.
- You can use the "hamburger" menu and see upload options appear.
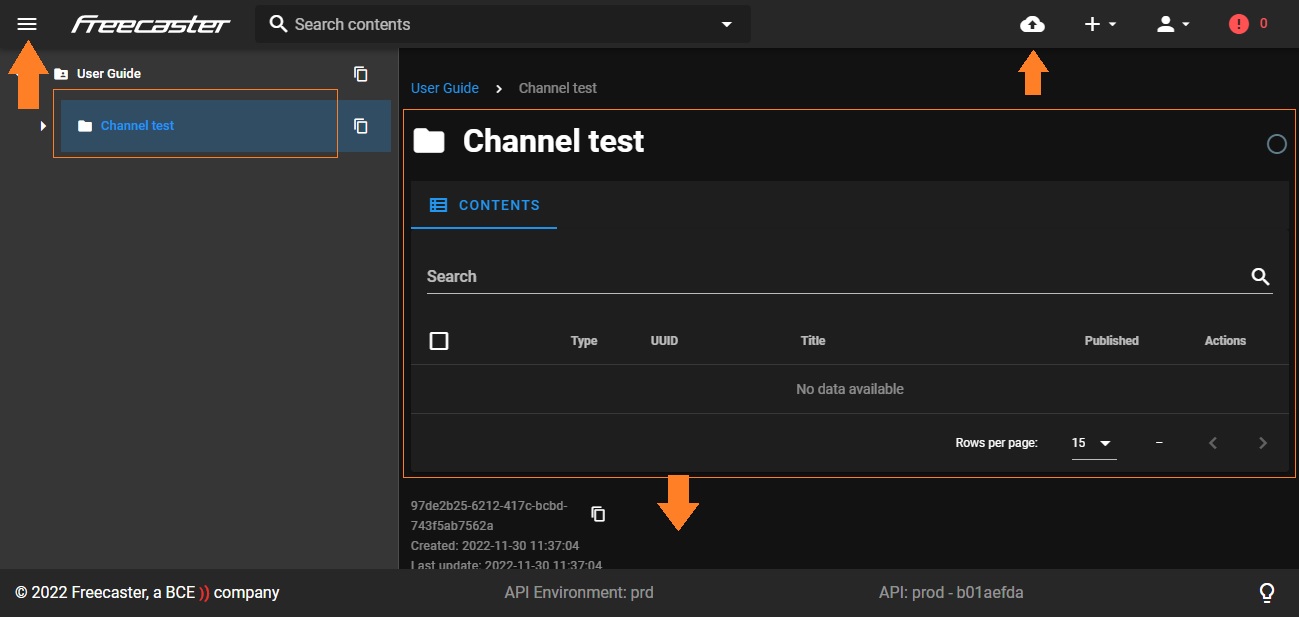
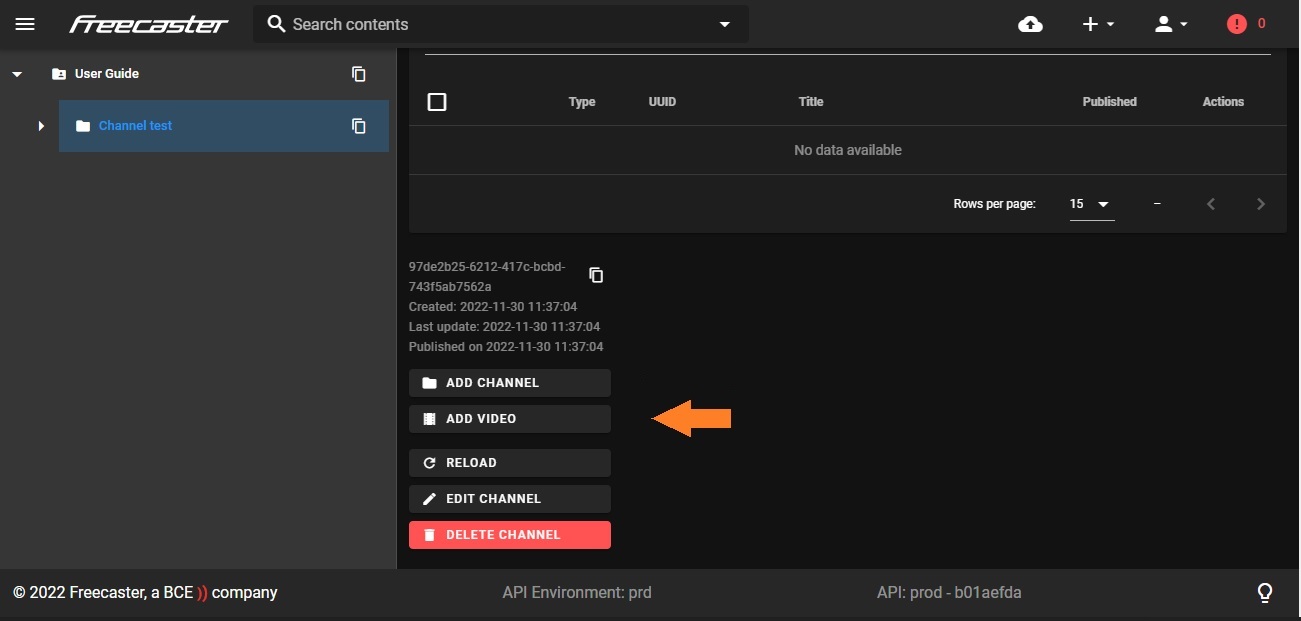
- You can use the "Add Video" button.
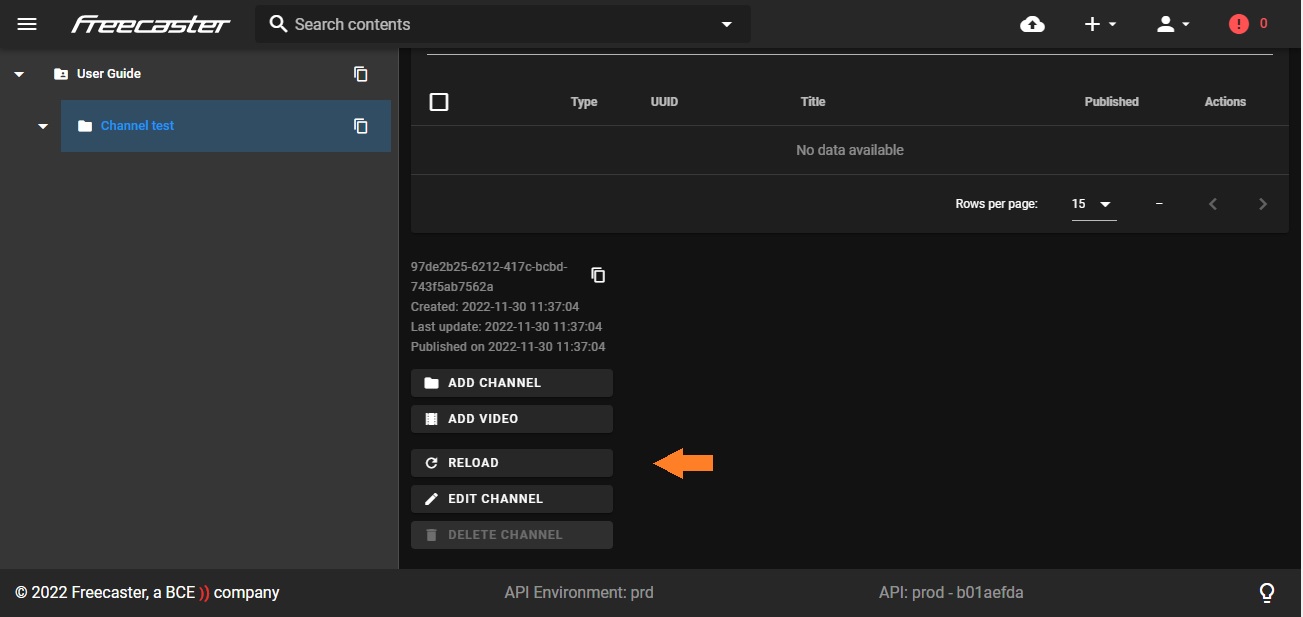
- It may be necessary to refresh the page to display the video by clicking on "Reload" or on the button used to refresh your browser page, the time of the availability of the video will depend on its weight, its duration and the time of transcoding.
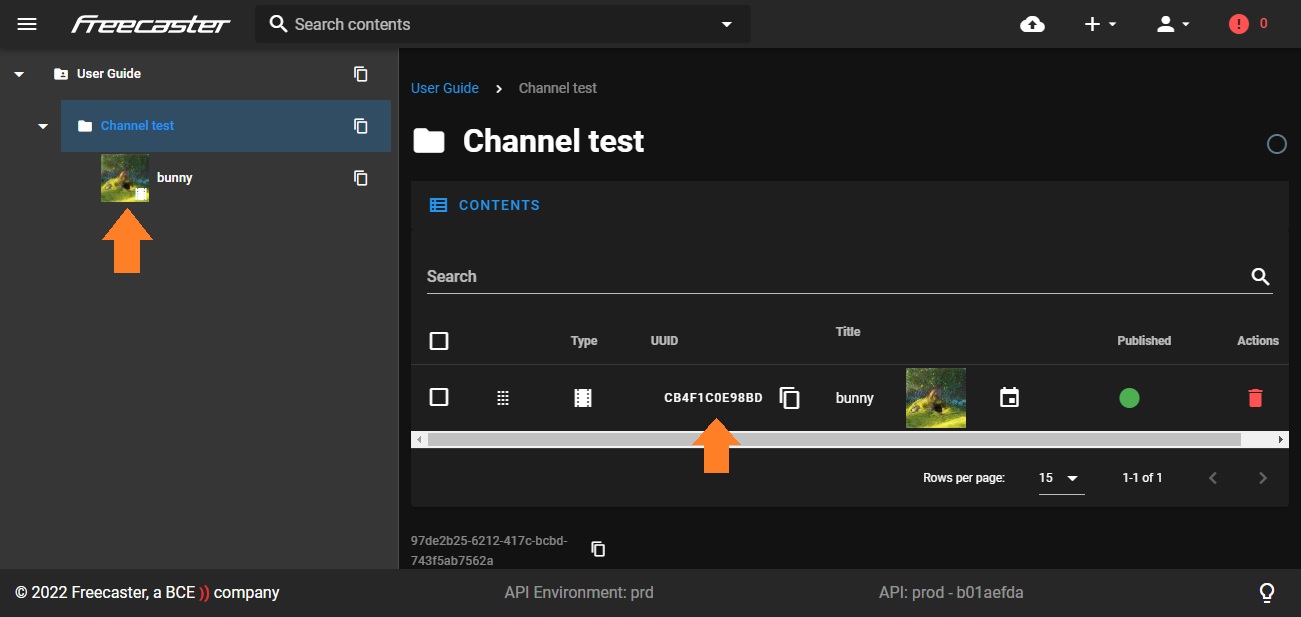
Managing "his" video
- You can click on your video in the tree view.
- You can click on the UUID of your video in the channel.
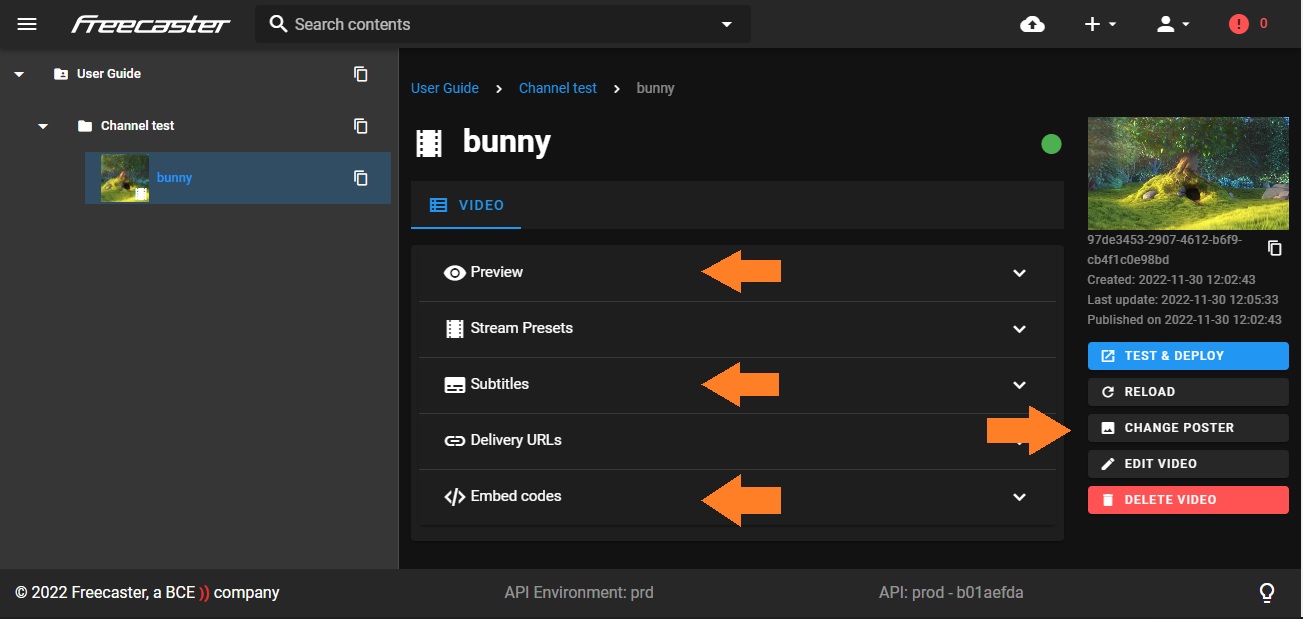
 The 4 most commonly used options are:
 - Preview = allowing you to view your video.
- Subtitles = allows the management of its subtitles
- Embedded codes = allows to predefine the options of the behavior of the player and to recover the code to be integrated.
- Change poster = allows to choose/change the posterframe of the video.
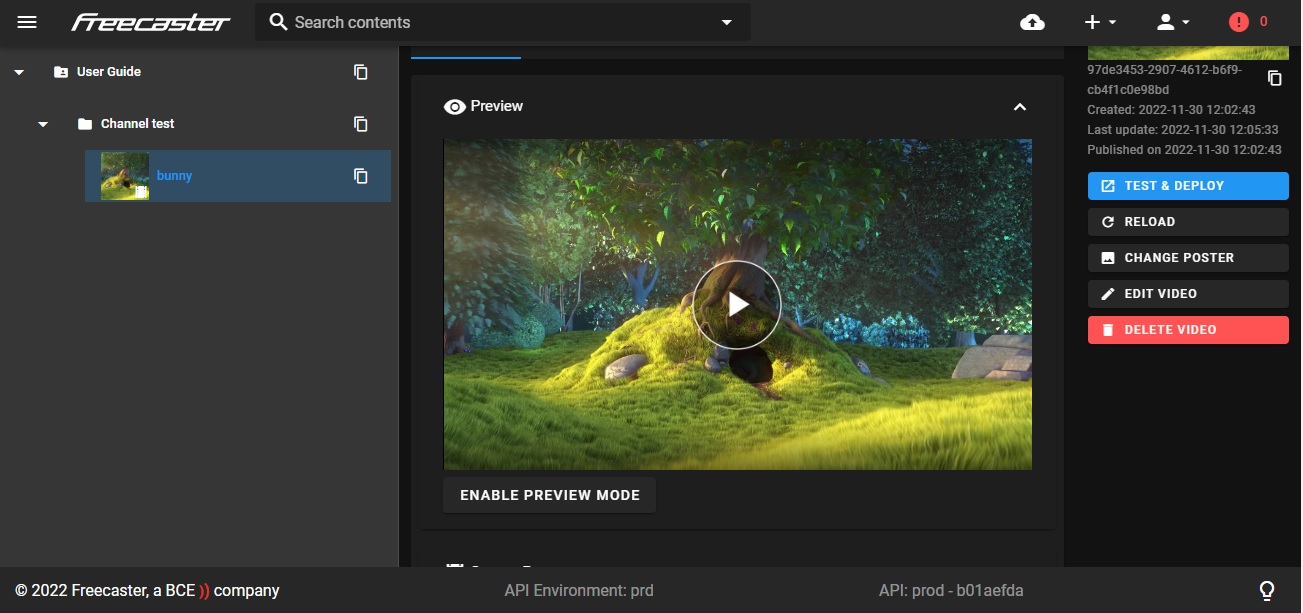
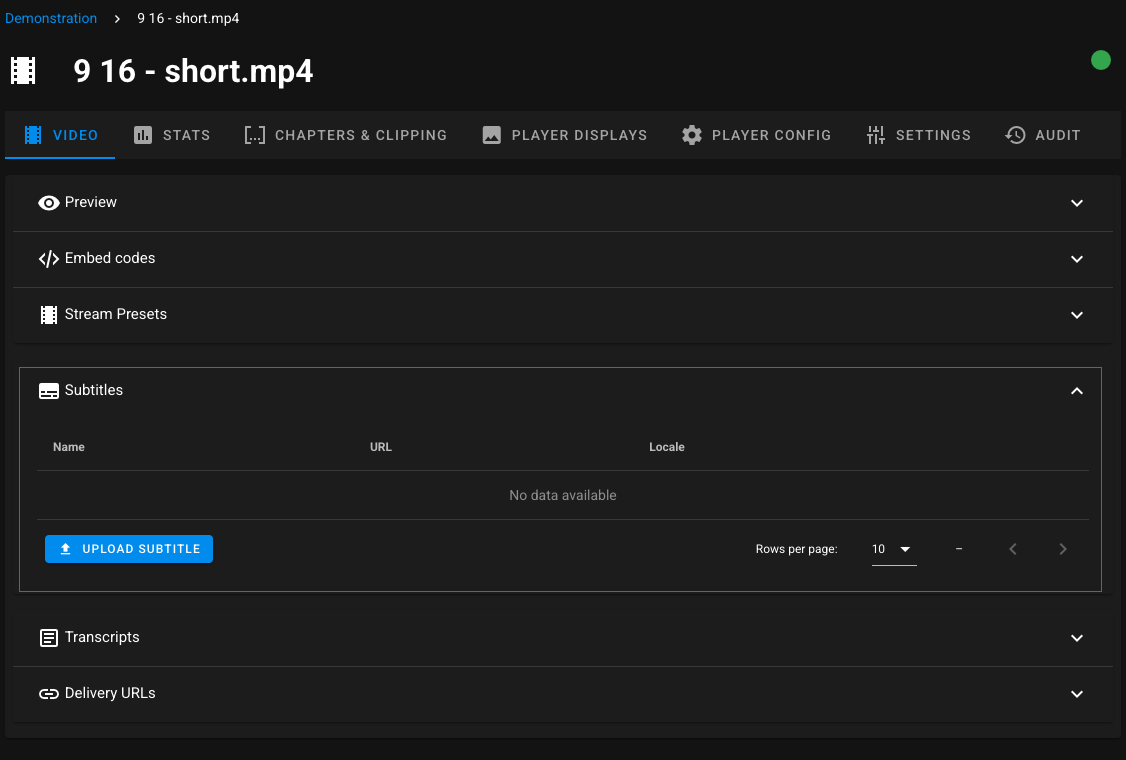
Preview
Subtitles
Supported formats
The platform supports subtitle files in SRT, TTML, XLS, and VTT formats. You can upload files with the following extensions: .srt, .ttml, .xml, .xls, .vtt.
How to Upload Subtitles
-
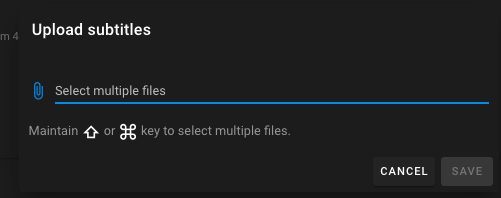
Click on "Upload subtitles".
-
Select one or more files in one of the supported formats
-
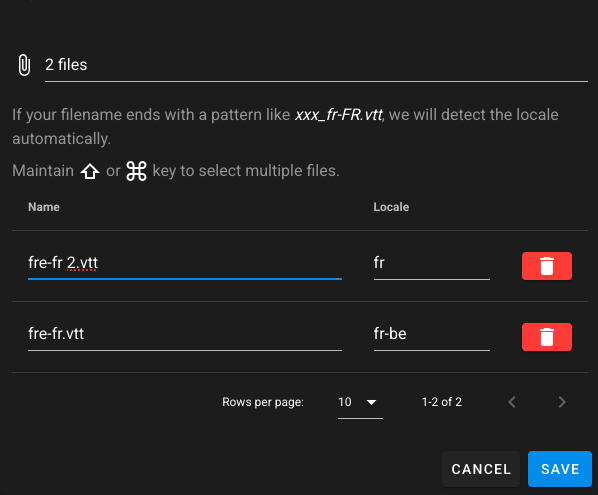
Enter a language code (in ISO 2-letter or 3-letter format) for each file. The system will automatically convert ISO2 to ISO3 codes.
About Language Codes
ISO language codes are standardized abbreviations for languages. You can also specify a region (e.g., eng-us for U.S. English or eng-gb for British English).
See full list here: ISO Language Codes
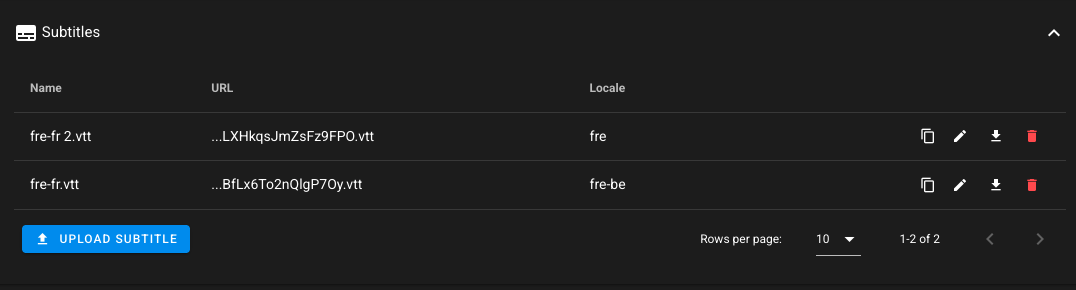
Once uploaded, subtitles will appear in a list showing their locale and ID. To the right of each subtitle, you can edit the file or locale, or delete it. Subtitles will also appear in the video preview.
Subtitle format examples
Make sure your files follow these specifications to ensure proper upload:
SRT
1
00:00:00,000 --> 00:00:01,500
{\an1}<i><b>I'm the first subtitle.</b></i>

2
00:00:01,500 --> 00:00:02,500
I'm another one.

3
00:00:03,000 --> 00:00:15,000
<i><font color='#00ffff'>And here is the </font>
<font color='magenta'>last subtitle.</font></i>
TTML
Warning
Multilingual support is not yet available for TTML. You can upload such files without error, but only the first language will be used for subtitles.
<tt xml:lang="en"
xmlns="http://www.w3.org/ns/ttml"
xmlns:tts="http://www.w3.org/ns/ttml#styling">
 <head>
    <styling xmlns:tts="http://www.w3.org/ns/ttml#styling">
     <style xml:id="s1" tts:textAlign="left"  />
     <style xml:id="s2" tts:fontStyle="italic" tts:fontWeight="bold" />
    </styling>
</head>

 <body>
    <div>
        <p xml:id="c1" begin="00:00:00" end="00:00:01.500" style="s1">
           <span tts:fontWeight="bold"><span tts:fontStyle="italic">I'm the first subtitle.</span></span>
        </p>
        <p xml:id="c2" begin="00:00:01.500" end="00:00:02.500">
            I'm another one.
        </p>
        <p xml:id="c3" begin="00:00:03.000" end="00:00:15" style="s2">
            <span tts:color="#00ffff">And here is the </span><br/>
            <span tts:color="magenta">last subtitle.</span>
        </p>
    </div>
 </body>
</tt>
VTT
WEBVTT

STYLE
::cue(line3) {
  font-style: italic;
  font-weight: bold;
}

00:00.000 --> 00:01.500 position:10% align:left size:35%
<v Narrator><b><i>I'm the first subtitle.</i></b></v>

00:01.500 --> 00:02.500 position:50% align:right size:35%
<v Narrator>I'm another one.</v>

line3
00:00:03.000 --> 00:15.000
<v Narrator><c.red>And here is the </c>
<c.magenta>last subtitle.</c></v>
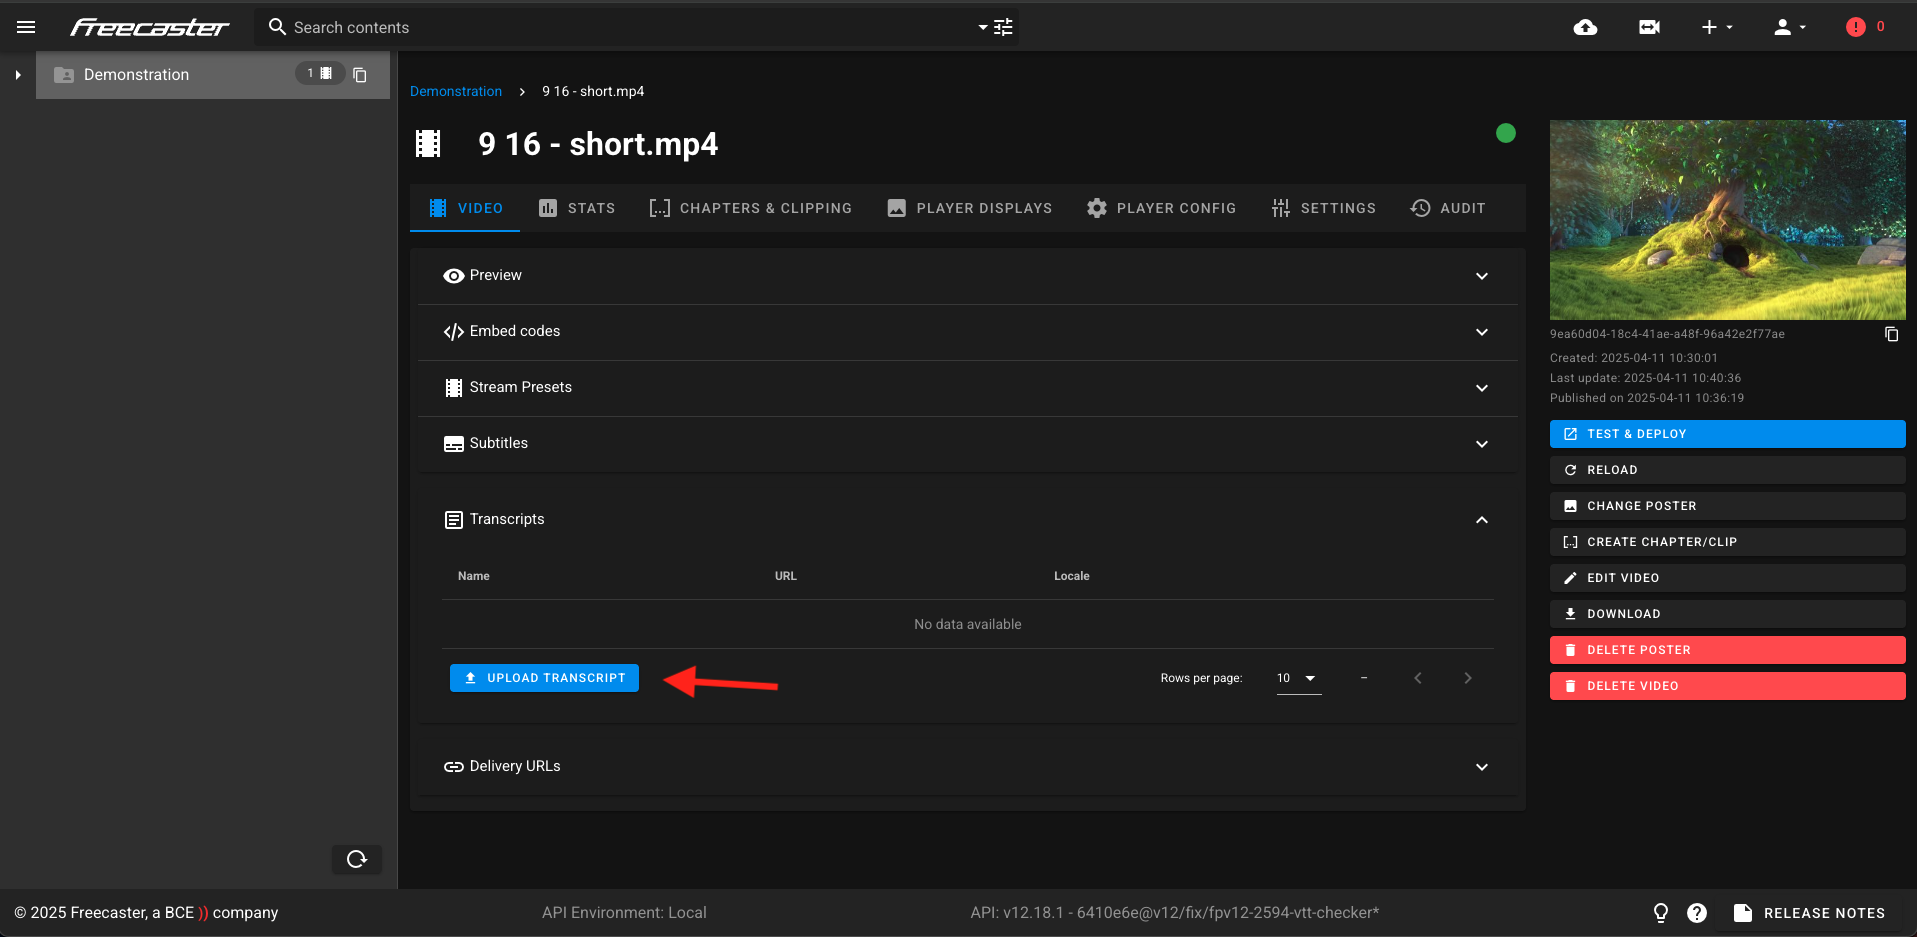
Transcripts
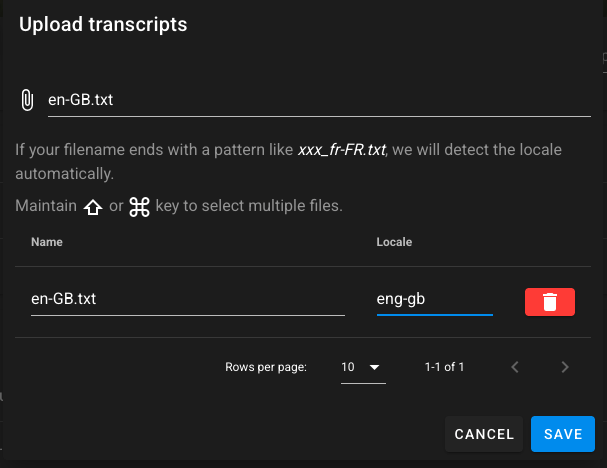
How to upload transcripts
-
Click on "Upload transcript".
-
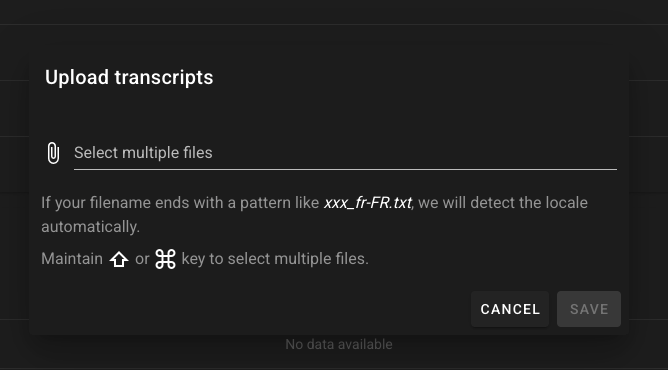
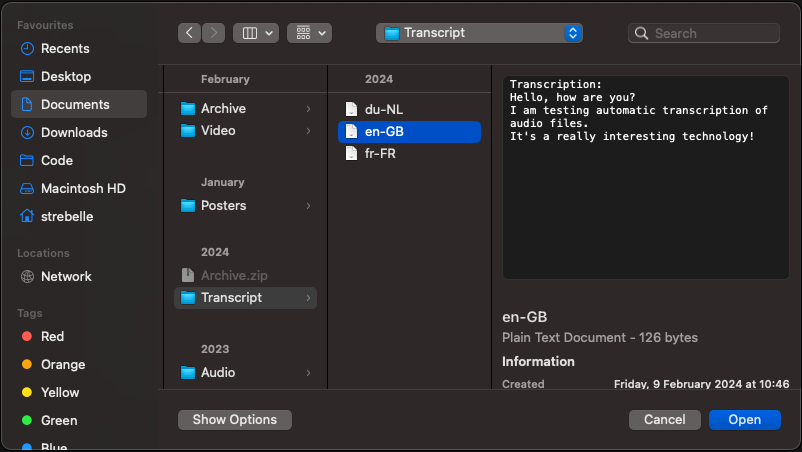
In the new window, click the “Select multiple files” field and choose the transcript files.
-
Enter the locale for each transcript, just like for subtitles.
-
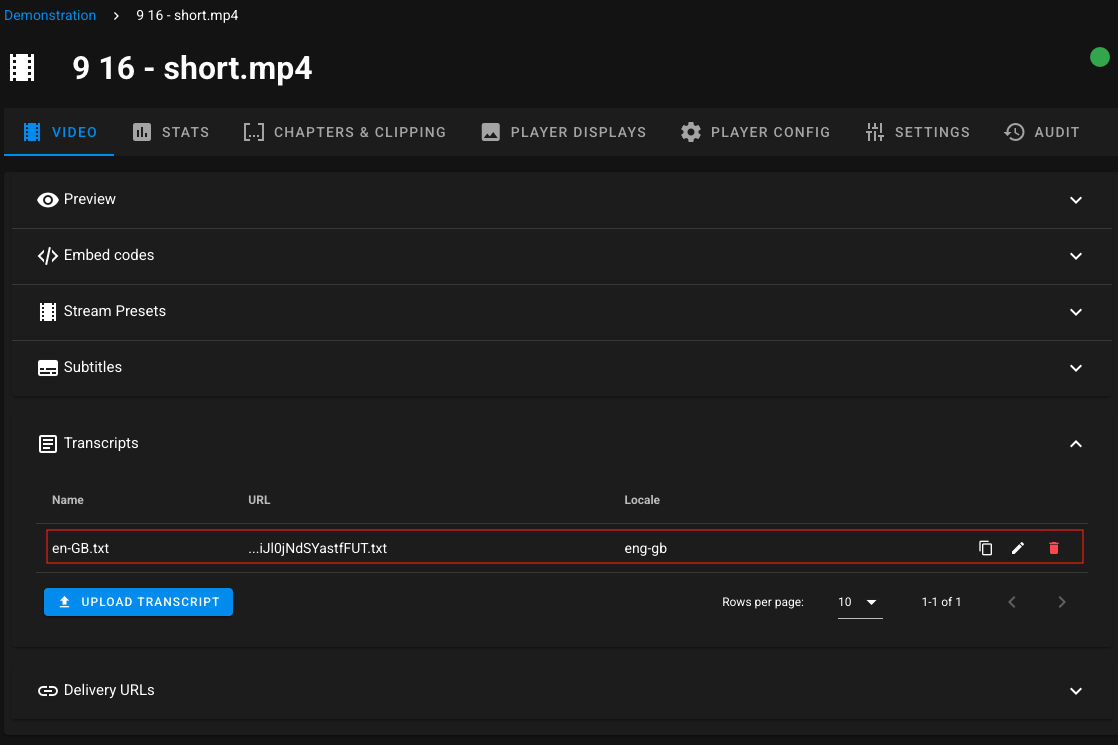
Once uploaded, each transcript entry allows you to copy the transcript ID, edit its locale or file and delete it from the list
Info
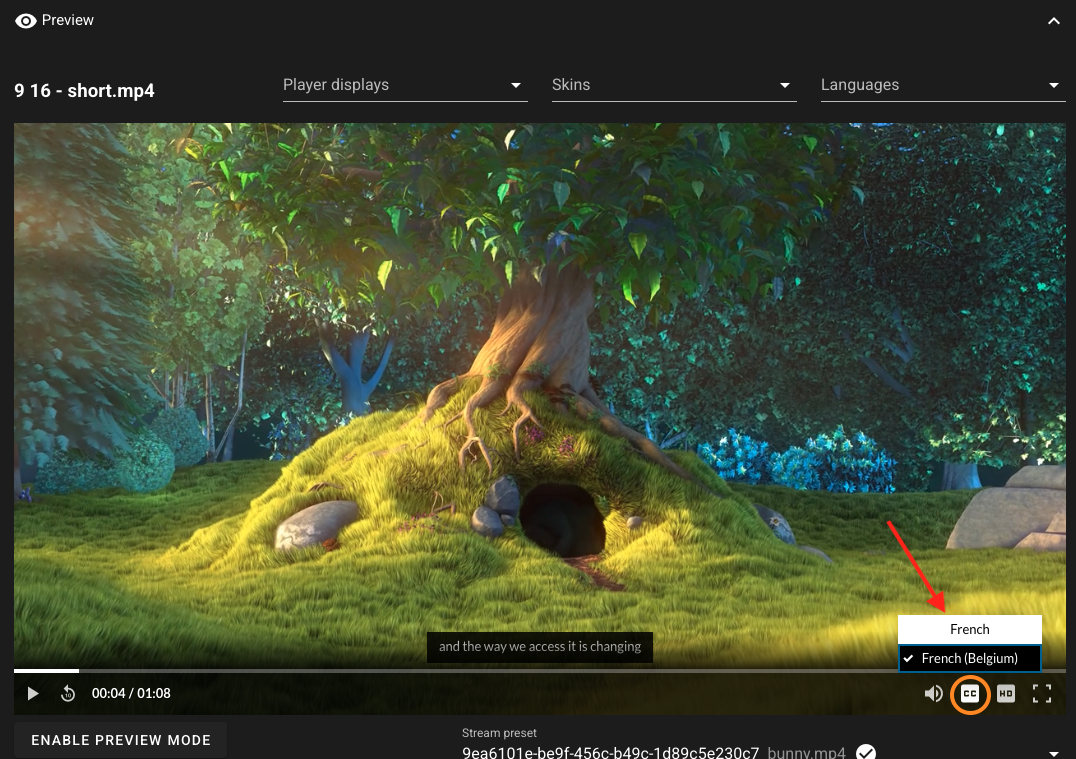
After uploading, the player cache will need to update itself. Once done, you can view the transcript by clicking the Transcript button in the preview player. You can also download the transcript using the download button at the top (highlighted in orange below).

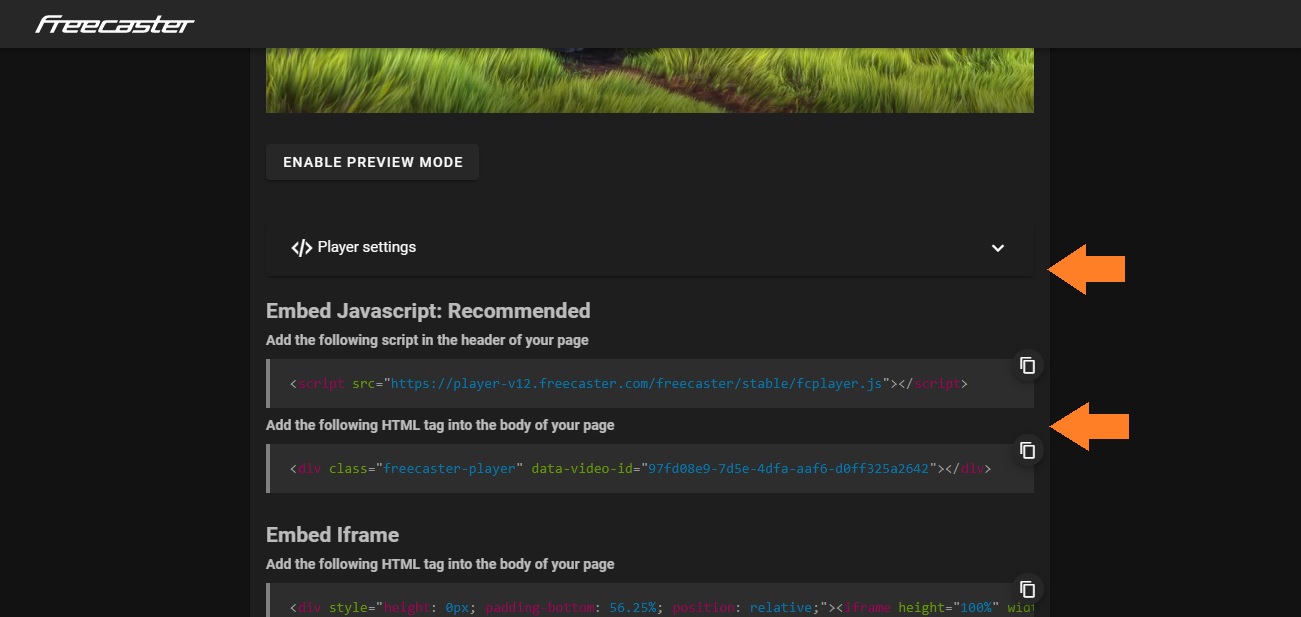
Embedded codes
-
The most commonly used functions appear.
-
Autoplay: automatically launches the player when the page is displayed without necessary interaction with the user (an alert will indicate that for the autoplay to work the "Mute" function must be activated).
- Mute: configures the player in basic mute.
- Controls: displays all player controls for the user (example: player scroll bar, etc.).
- Loop: loops the video.
- Stretching type: by default the players have a standard ratio (16/9, 9/3, ...) if the ratio of the video is different, this option makes it possible to force the stretching of the video content in the player (this avoid "black bands").
-
Do not track: statistics are deactivated by default, starting tracking allows them to be activated (according to GDPR regulations, users must accept cookies on a site to allow tracking).

-
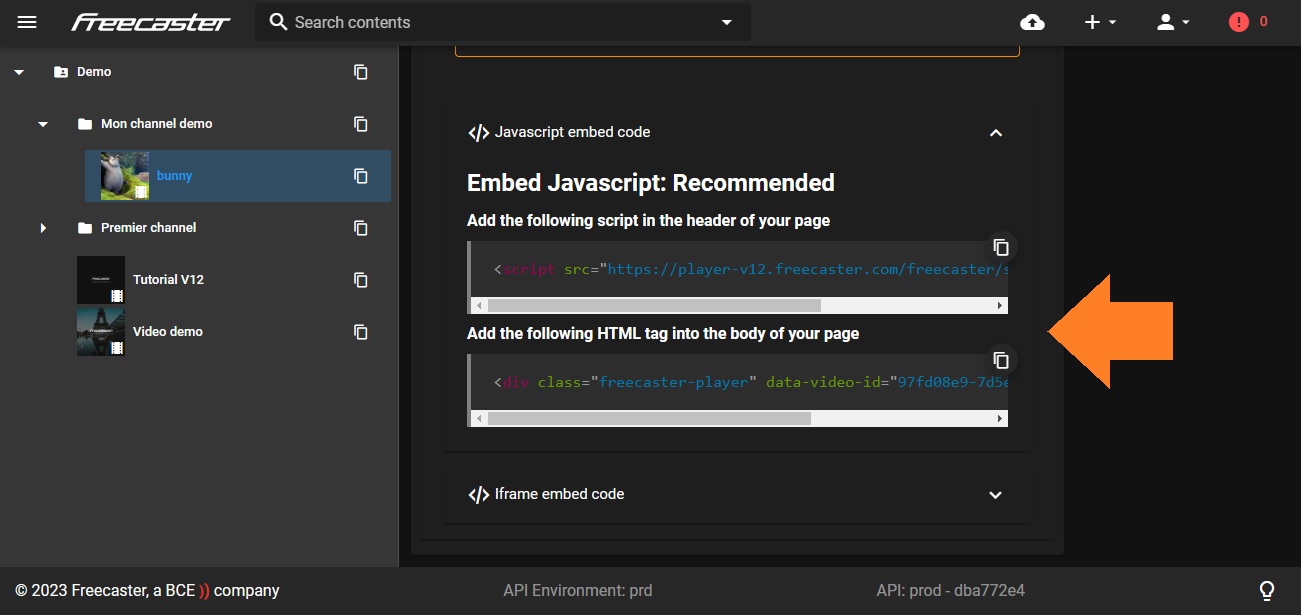
At the bottom of the list appear the embedded codes to recover. They change automatically according to the options chosen. The platform offers Javascript code (recommended) and I-frame.
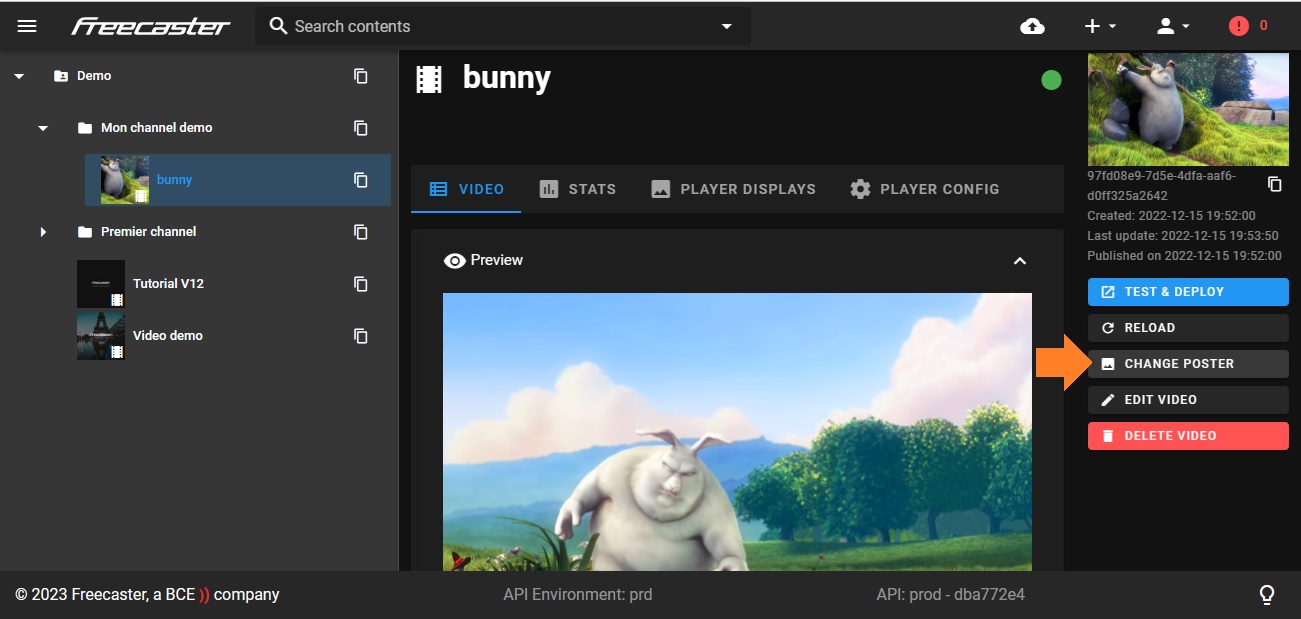
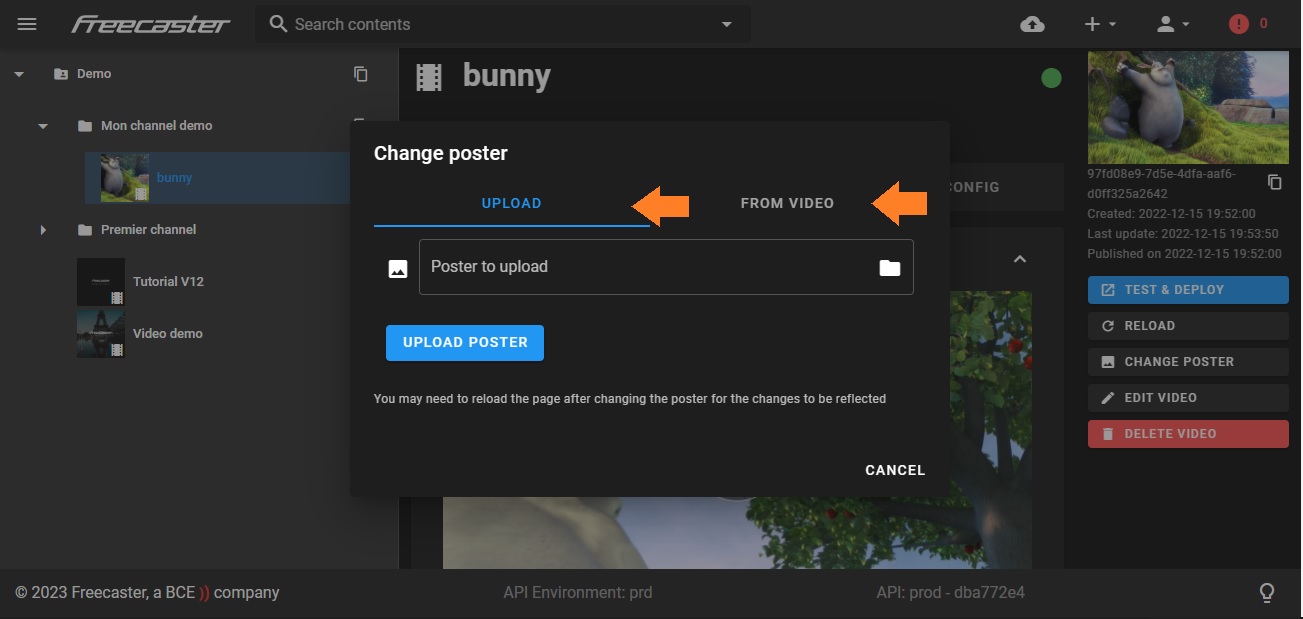
Change Posterframe
- Click on "Change poster".
-
The posterframe can be changed/selected in two different ways
-
Direct upload of an image from your computer by clicking on "Upload".
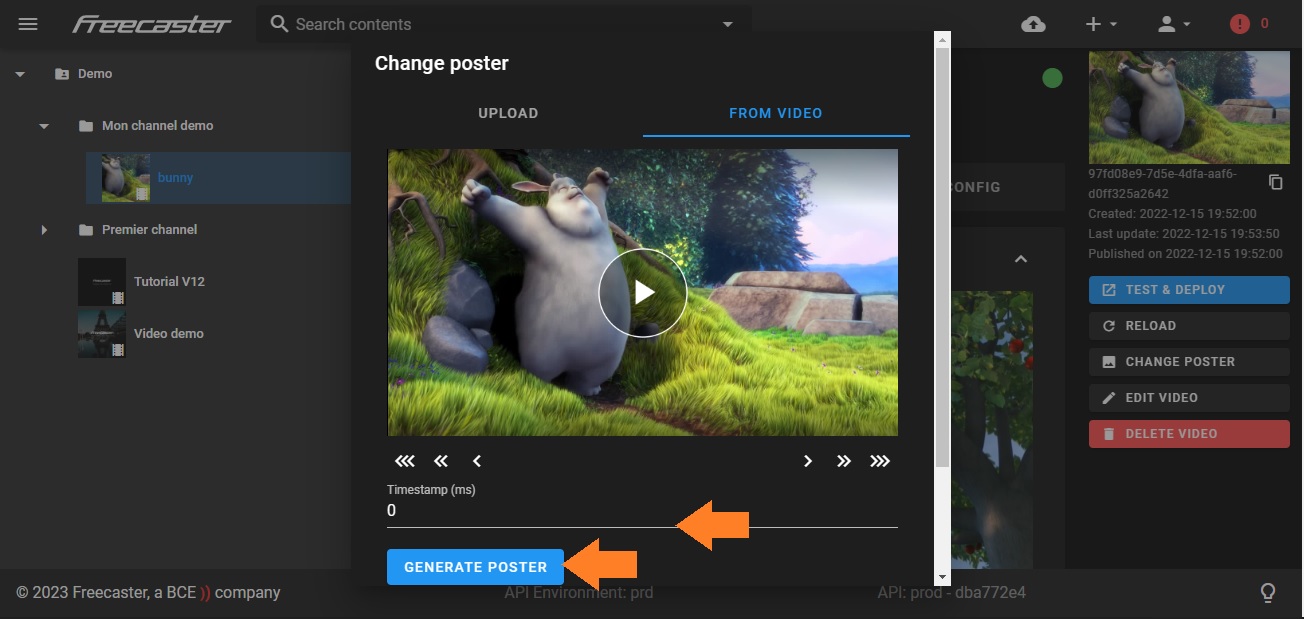
- The selection in the course of the video concerned of a precise frame by clicking on "From video" (just move the playback cursor then "Generate poster").
Create chapters and clips
Video chapters and clips allow you to break down longer videos into shorter segments
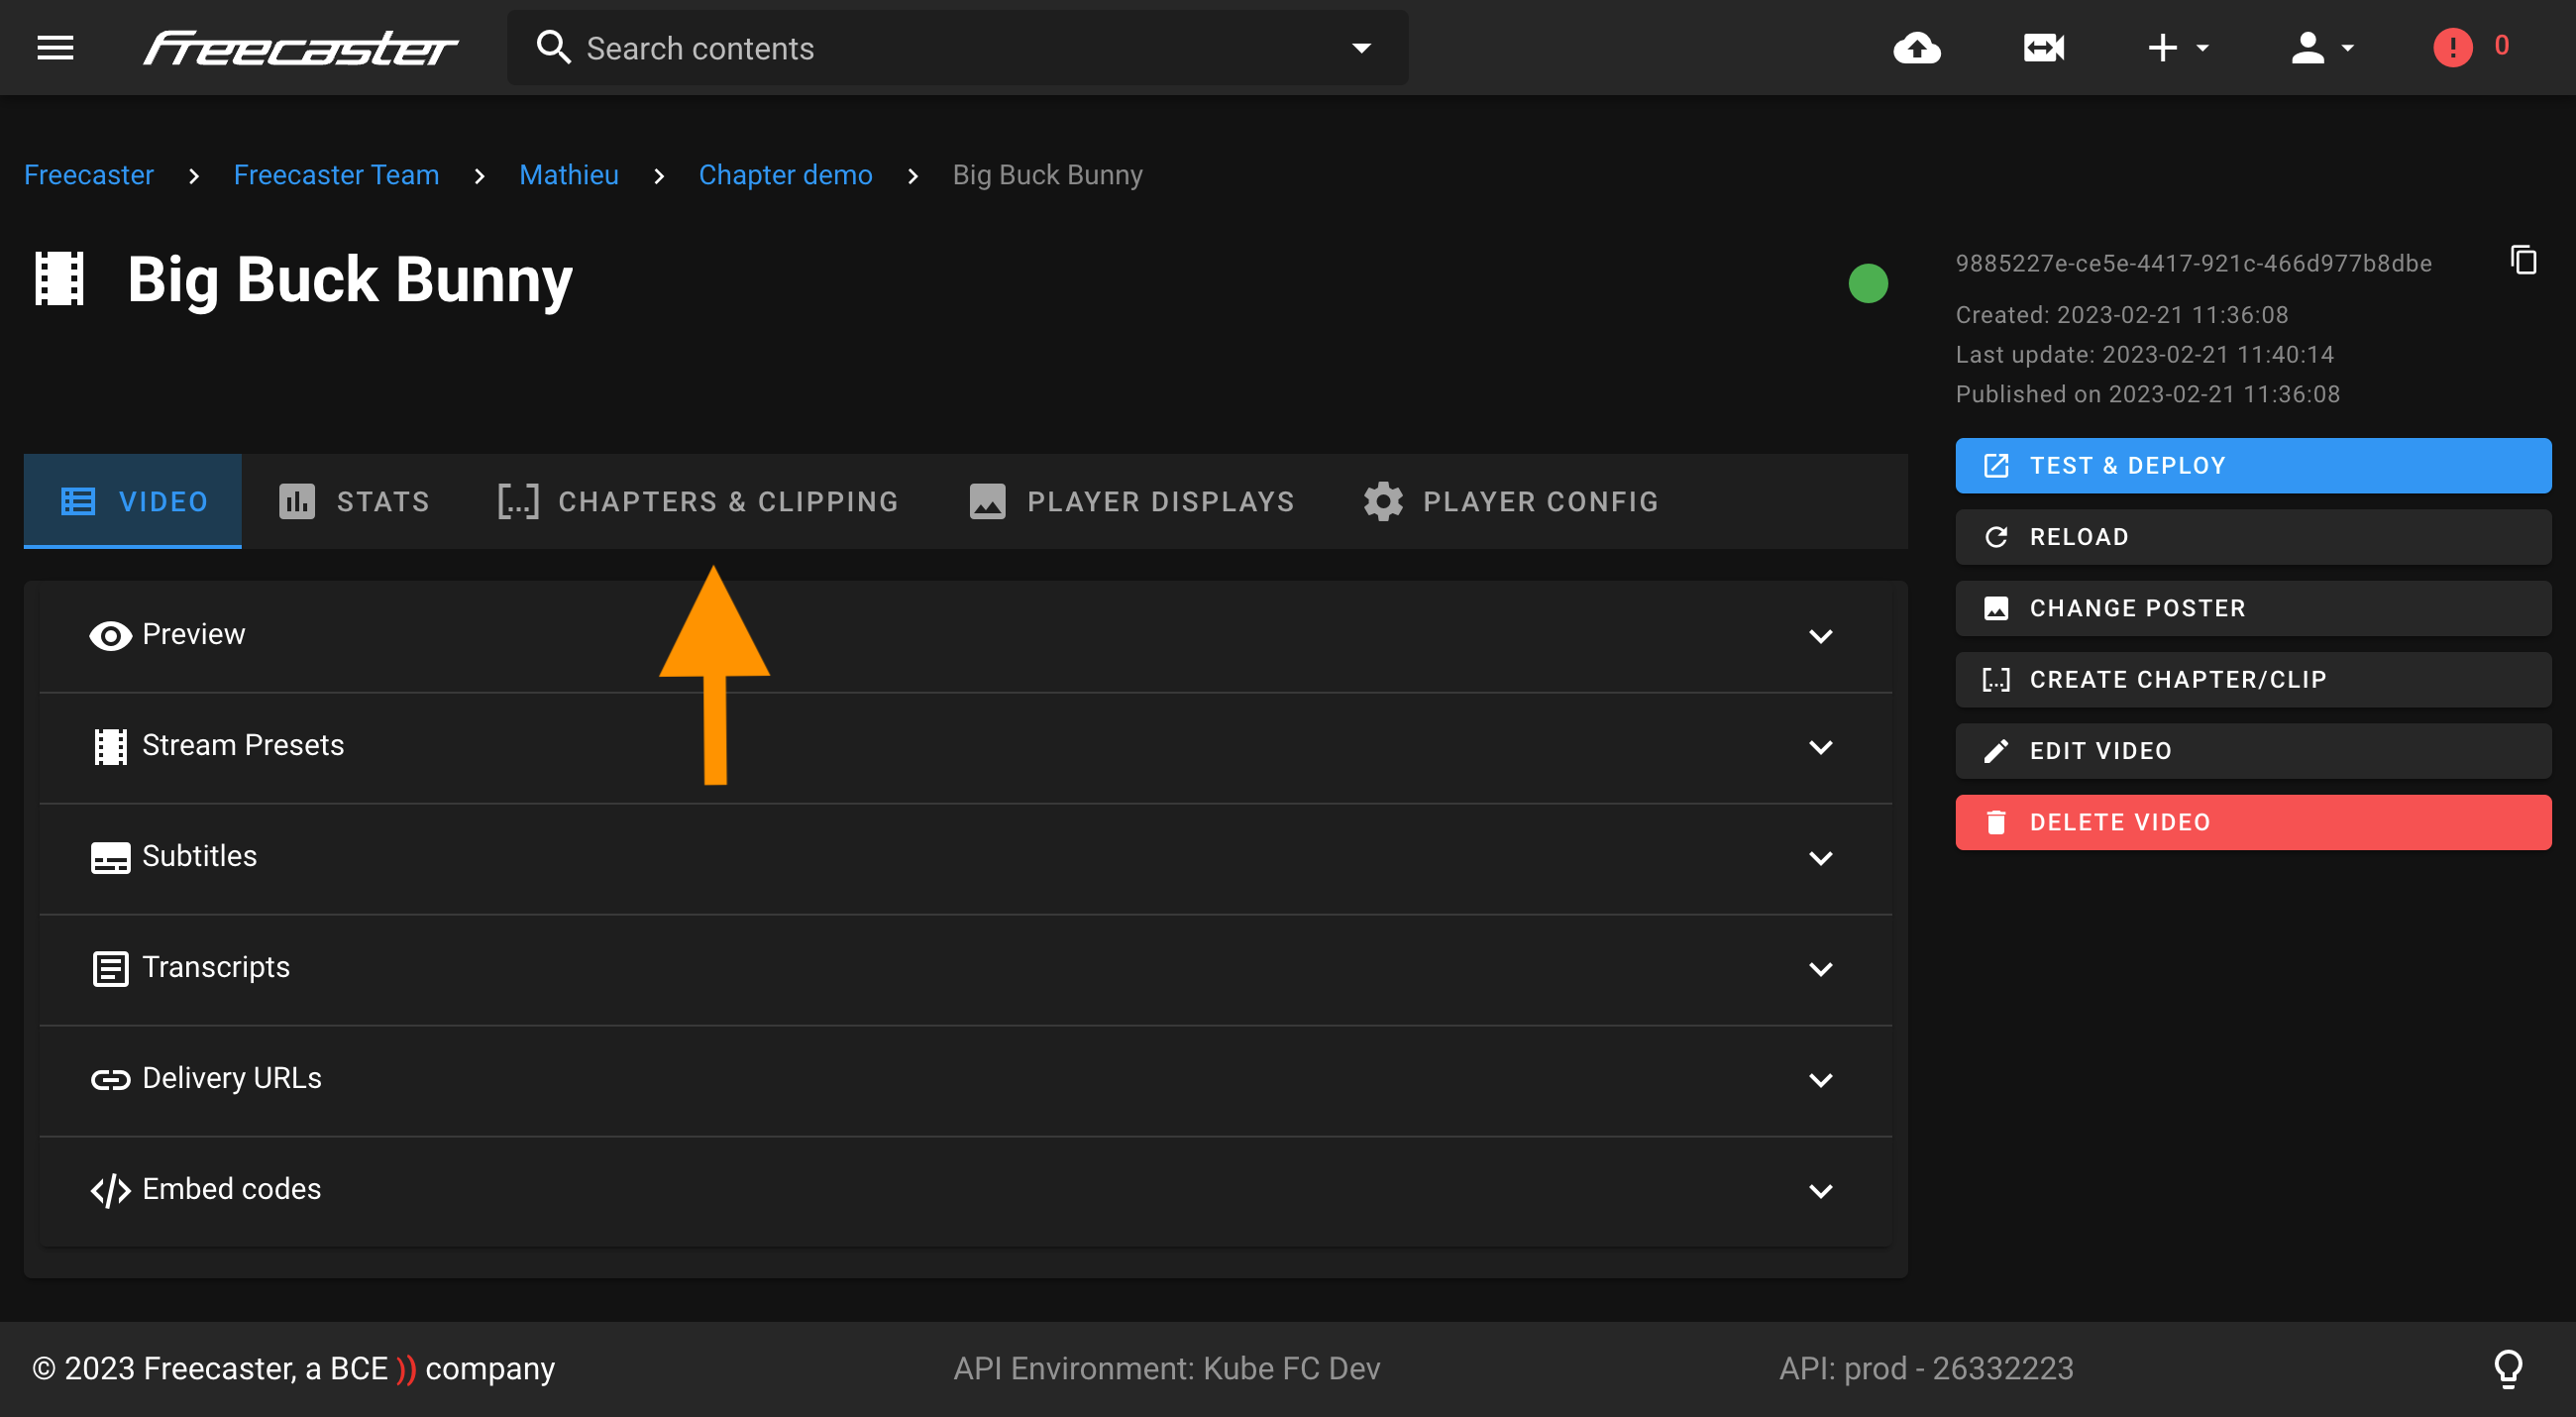
Creating video chapters
Here's how you can create a chapter:
- Navigate to the video you want to add chapters to.
- Click on the " Chapters & Clipping"
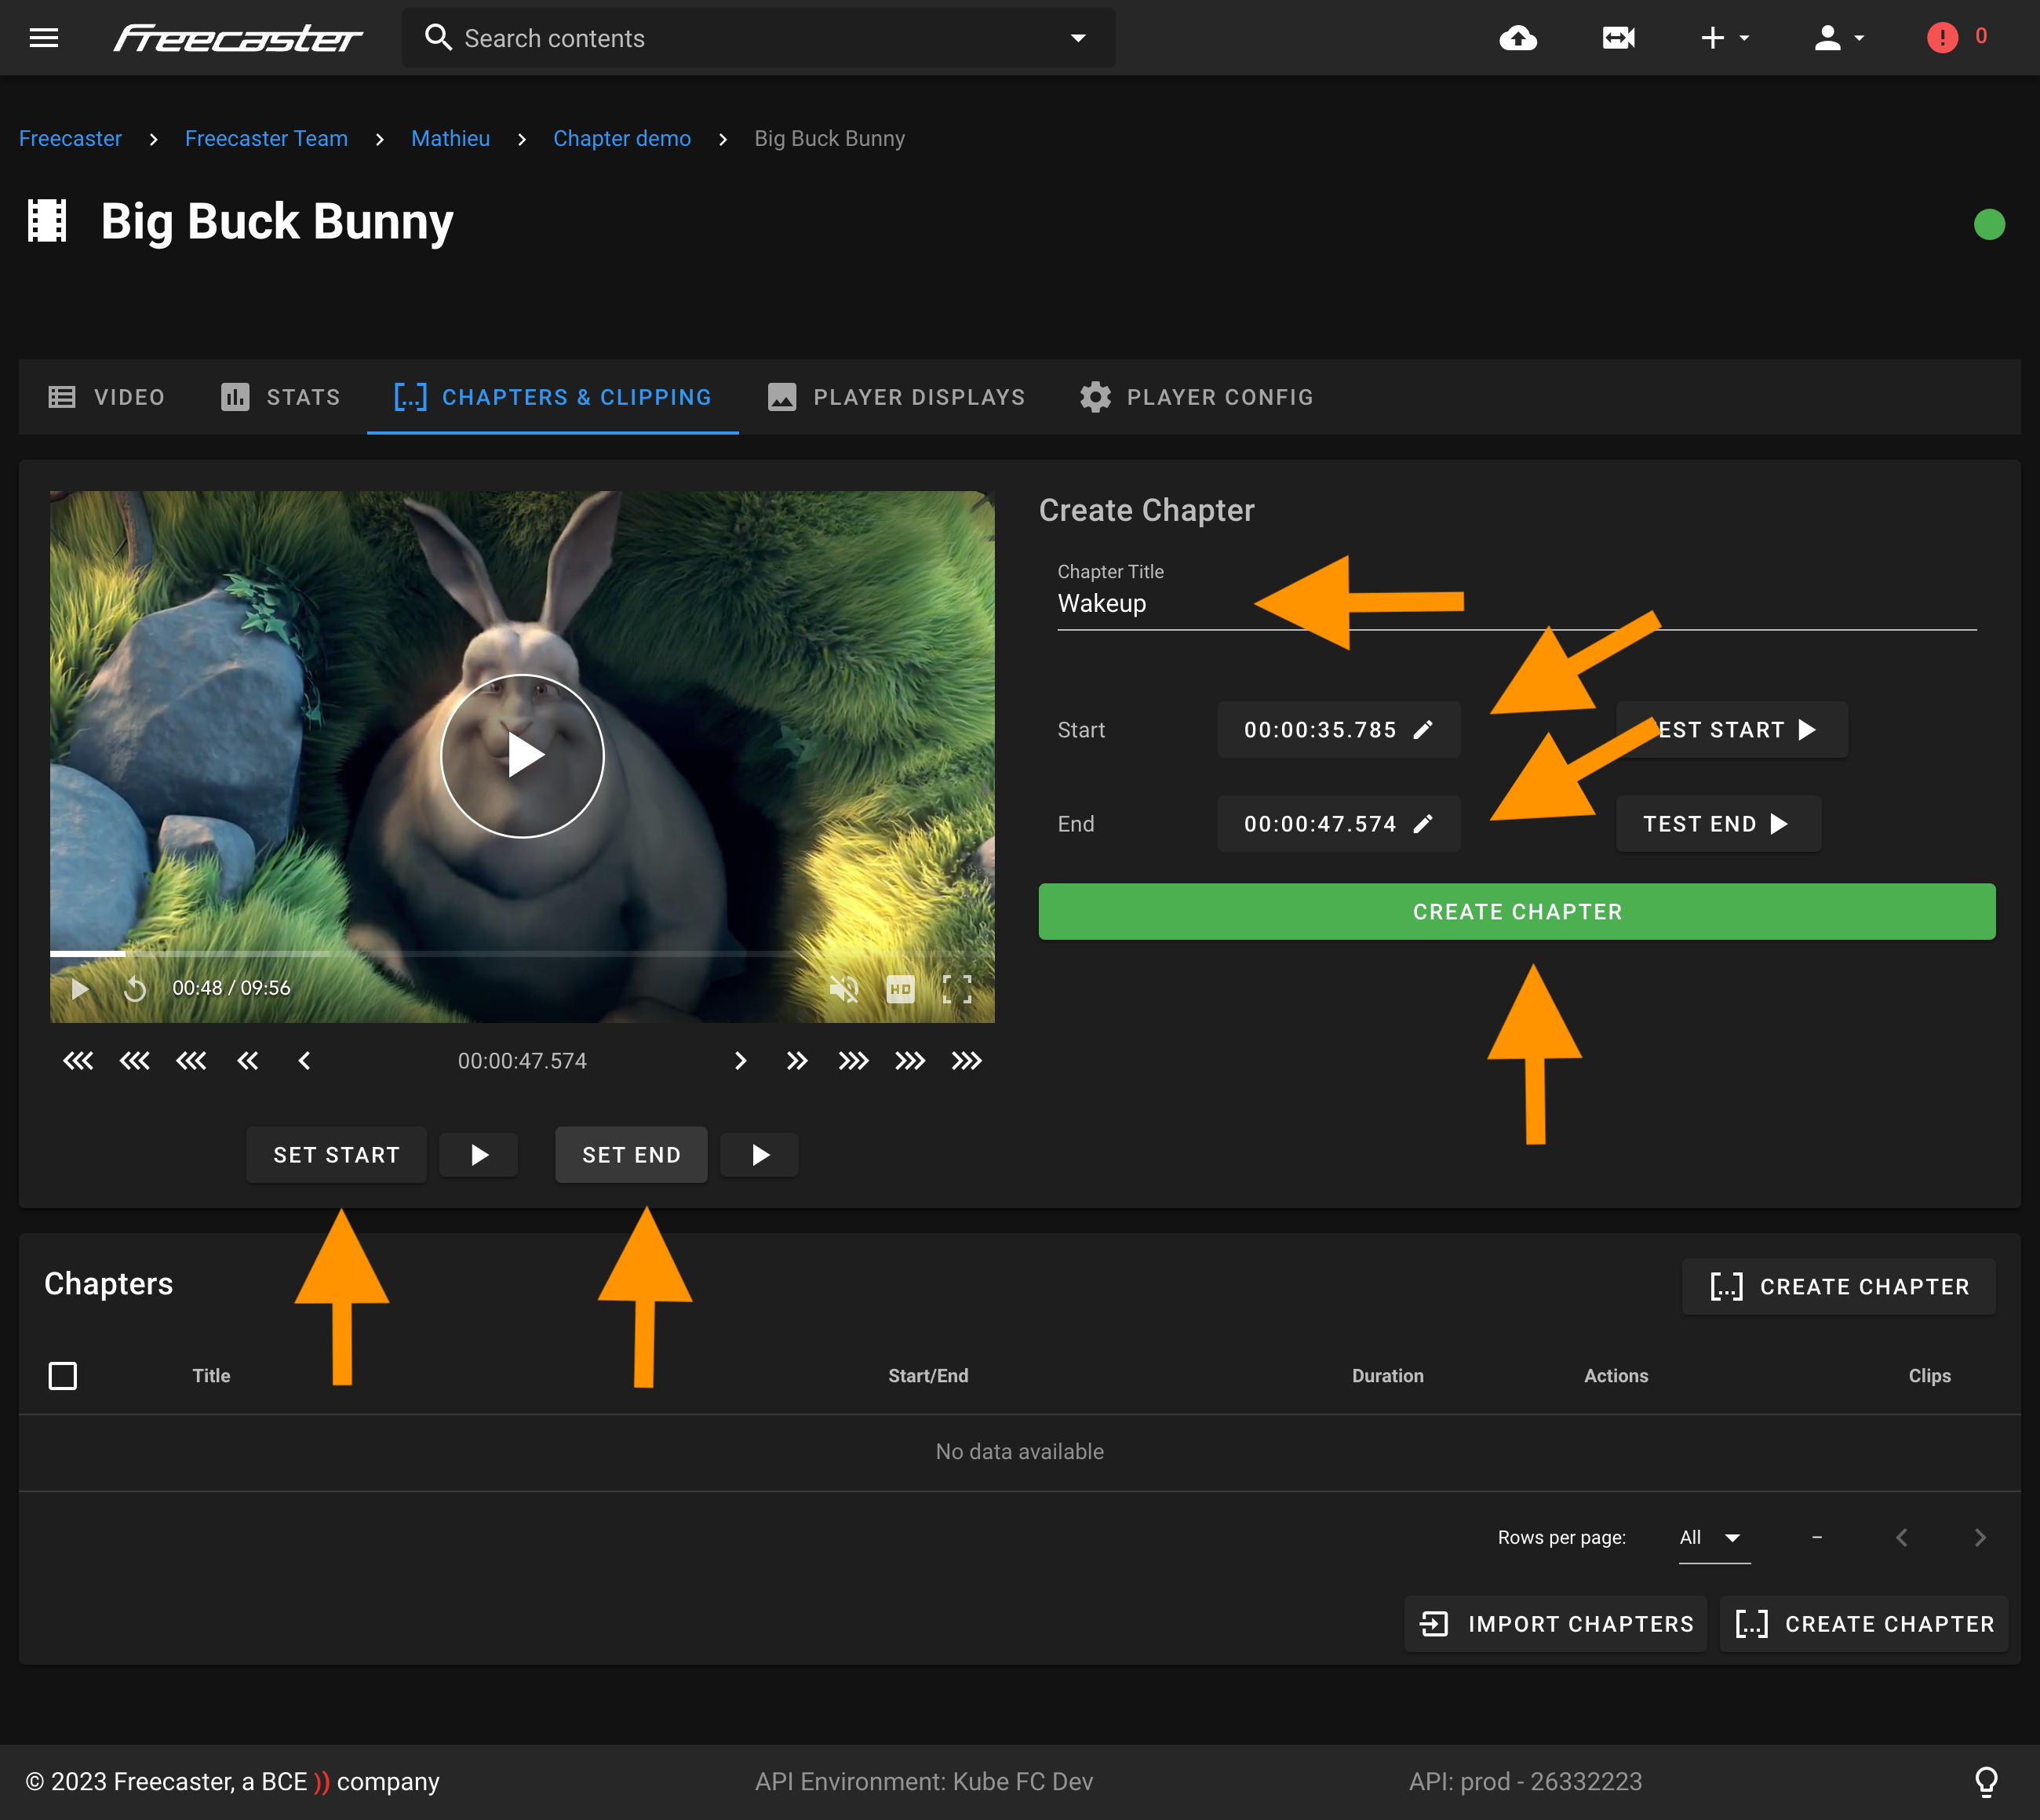
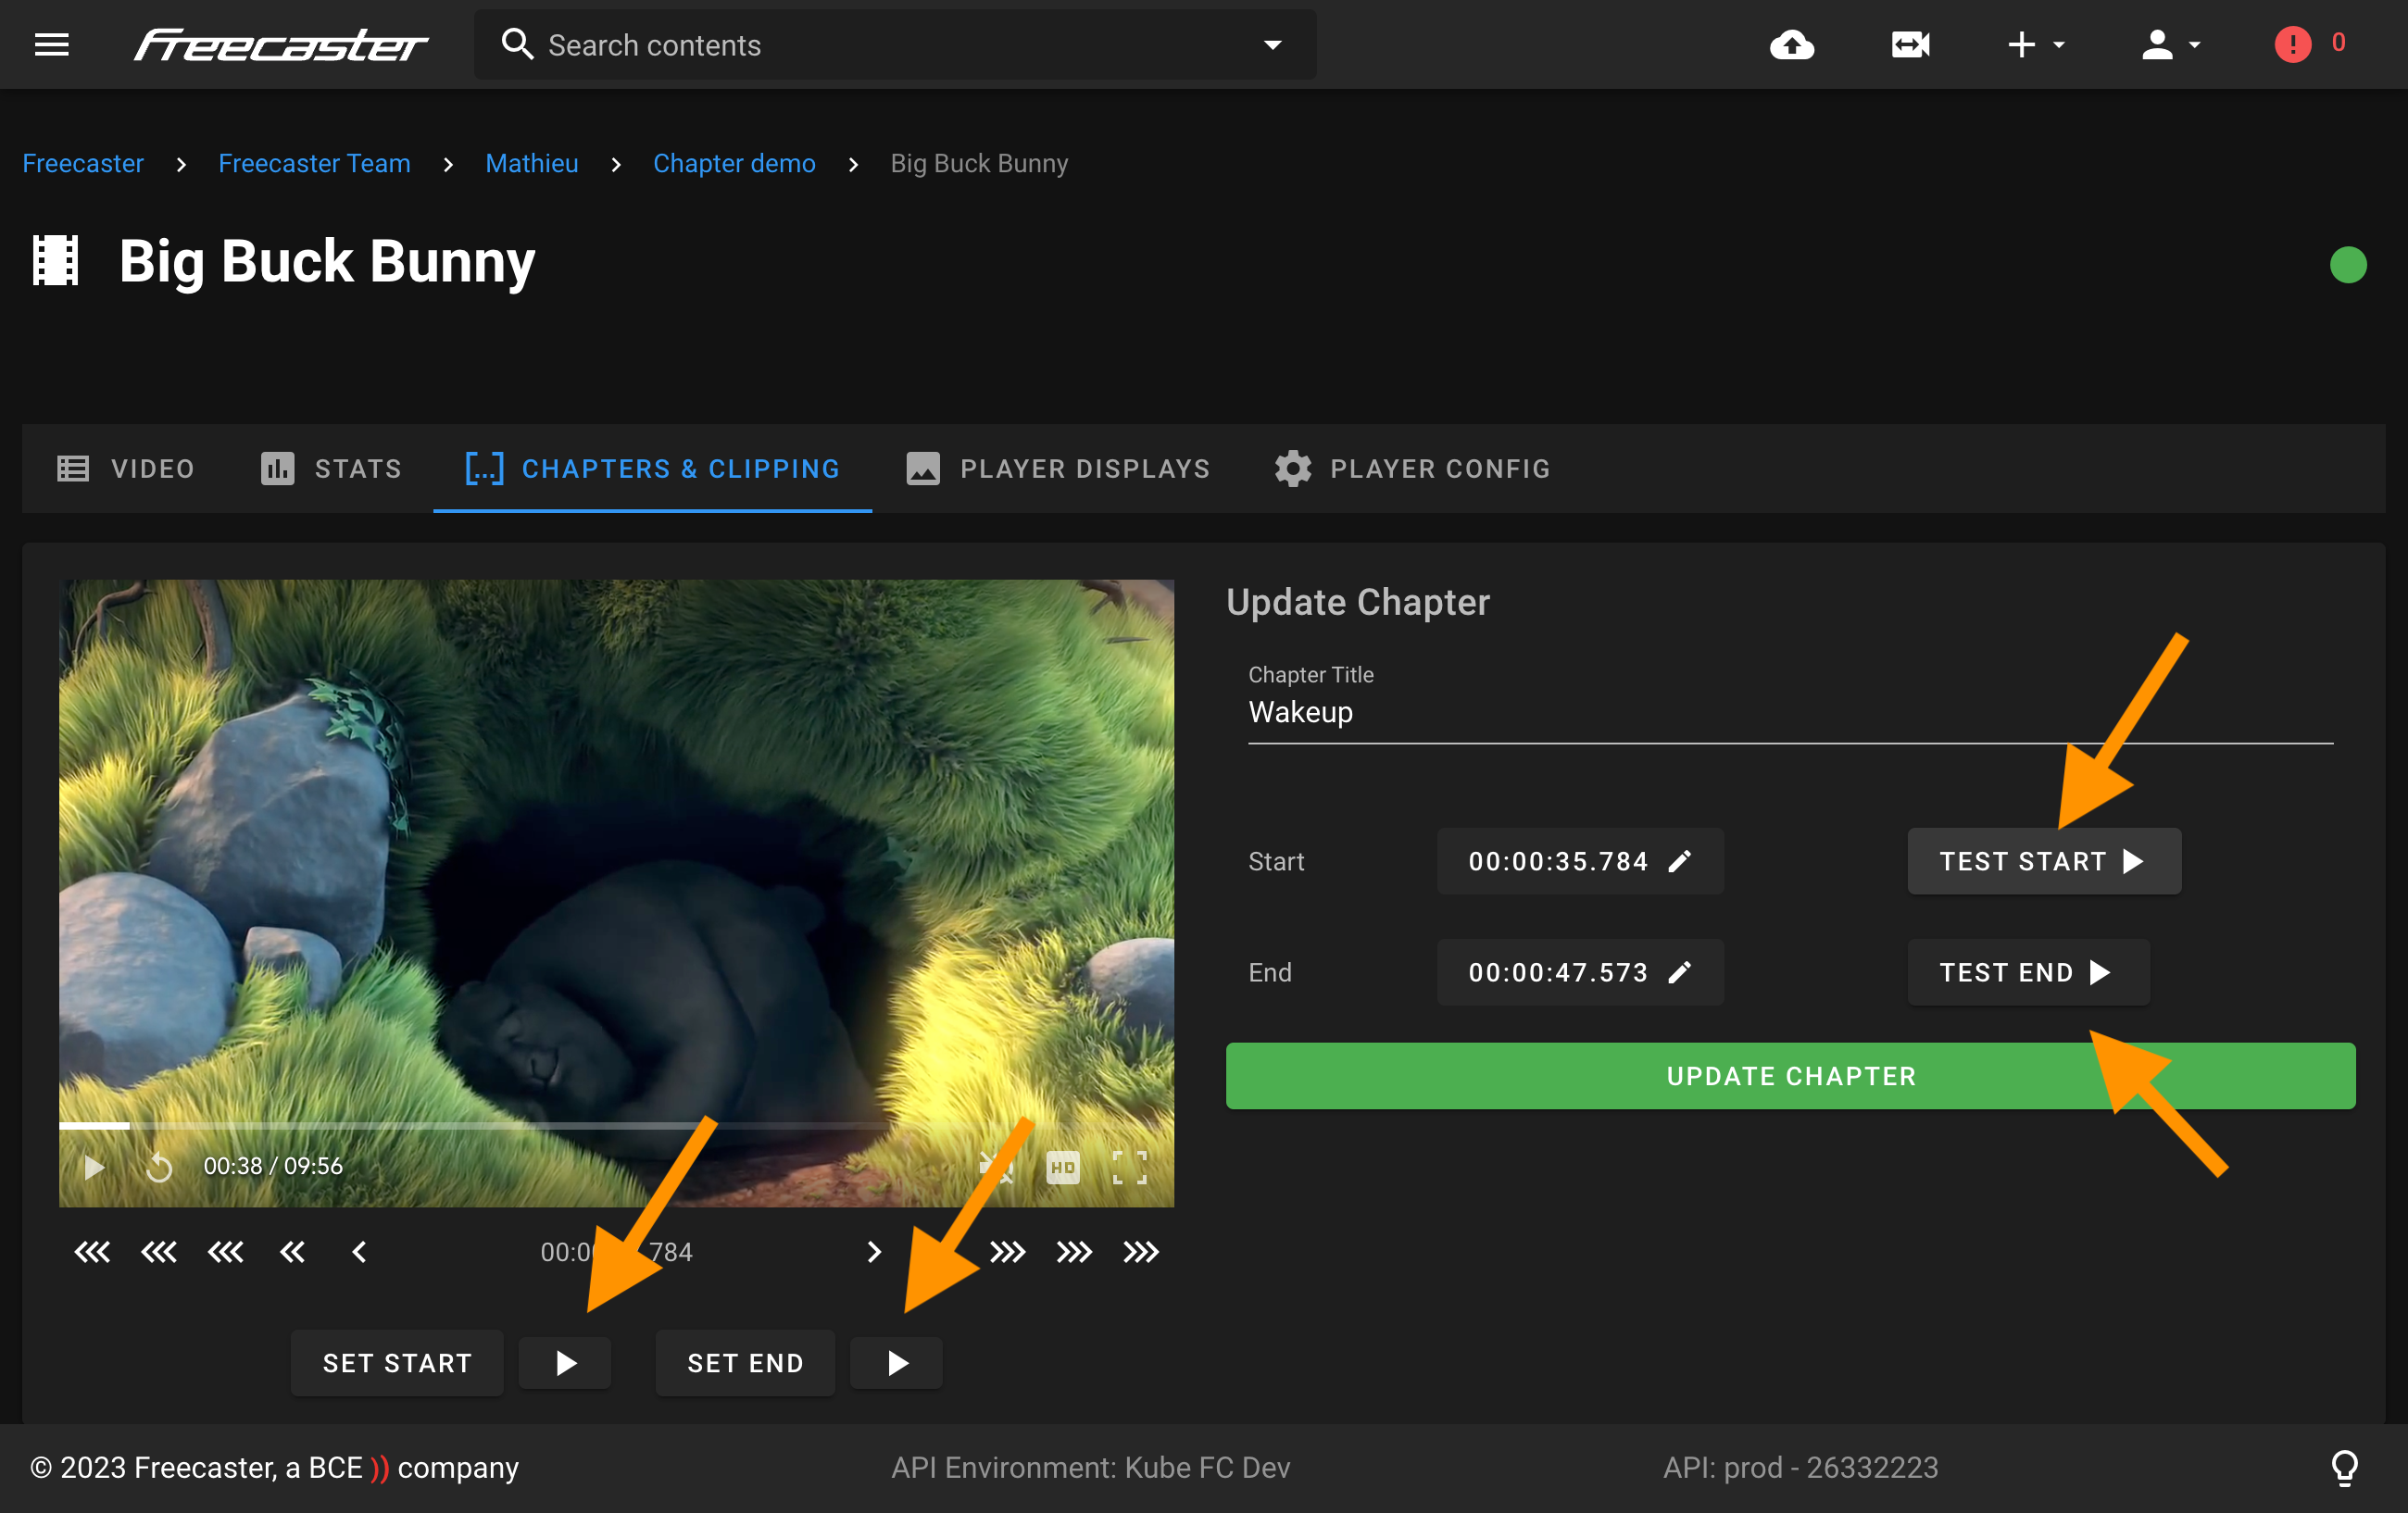
- Enter a title for the chapter
- To set the start, you can use the video player by going to the desired start time with the progress bar and clicking on the "Set Start" button. You can also enter the timestamps in the start input field.
- It’s the same way to set the end.
- The end is not mandatory. In this case, it is like a marker in the video.
- Click on the " Create Chapter" button to save your new chapter.
- Repeat the steps for each chapter you want to create
Testing your chapters
To ensure that your chapters have been set up correctly, you can test the start and end
- Click on the **"Test Start " button to start the video at the beginning of the chapter and stop it 2 seconds later.
- Click on the "Test End " button to start the video 2 seconds before the end of the chapter and stop it at the end.
Create a video clip
To create a clip, you need to first create a chapter, and then use the clip action button associated with that chapter to generate the clip.
Here's how:
- Navigate to the video you want to create a clip from.
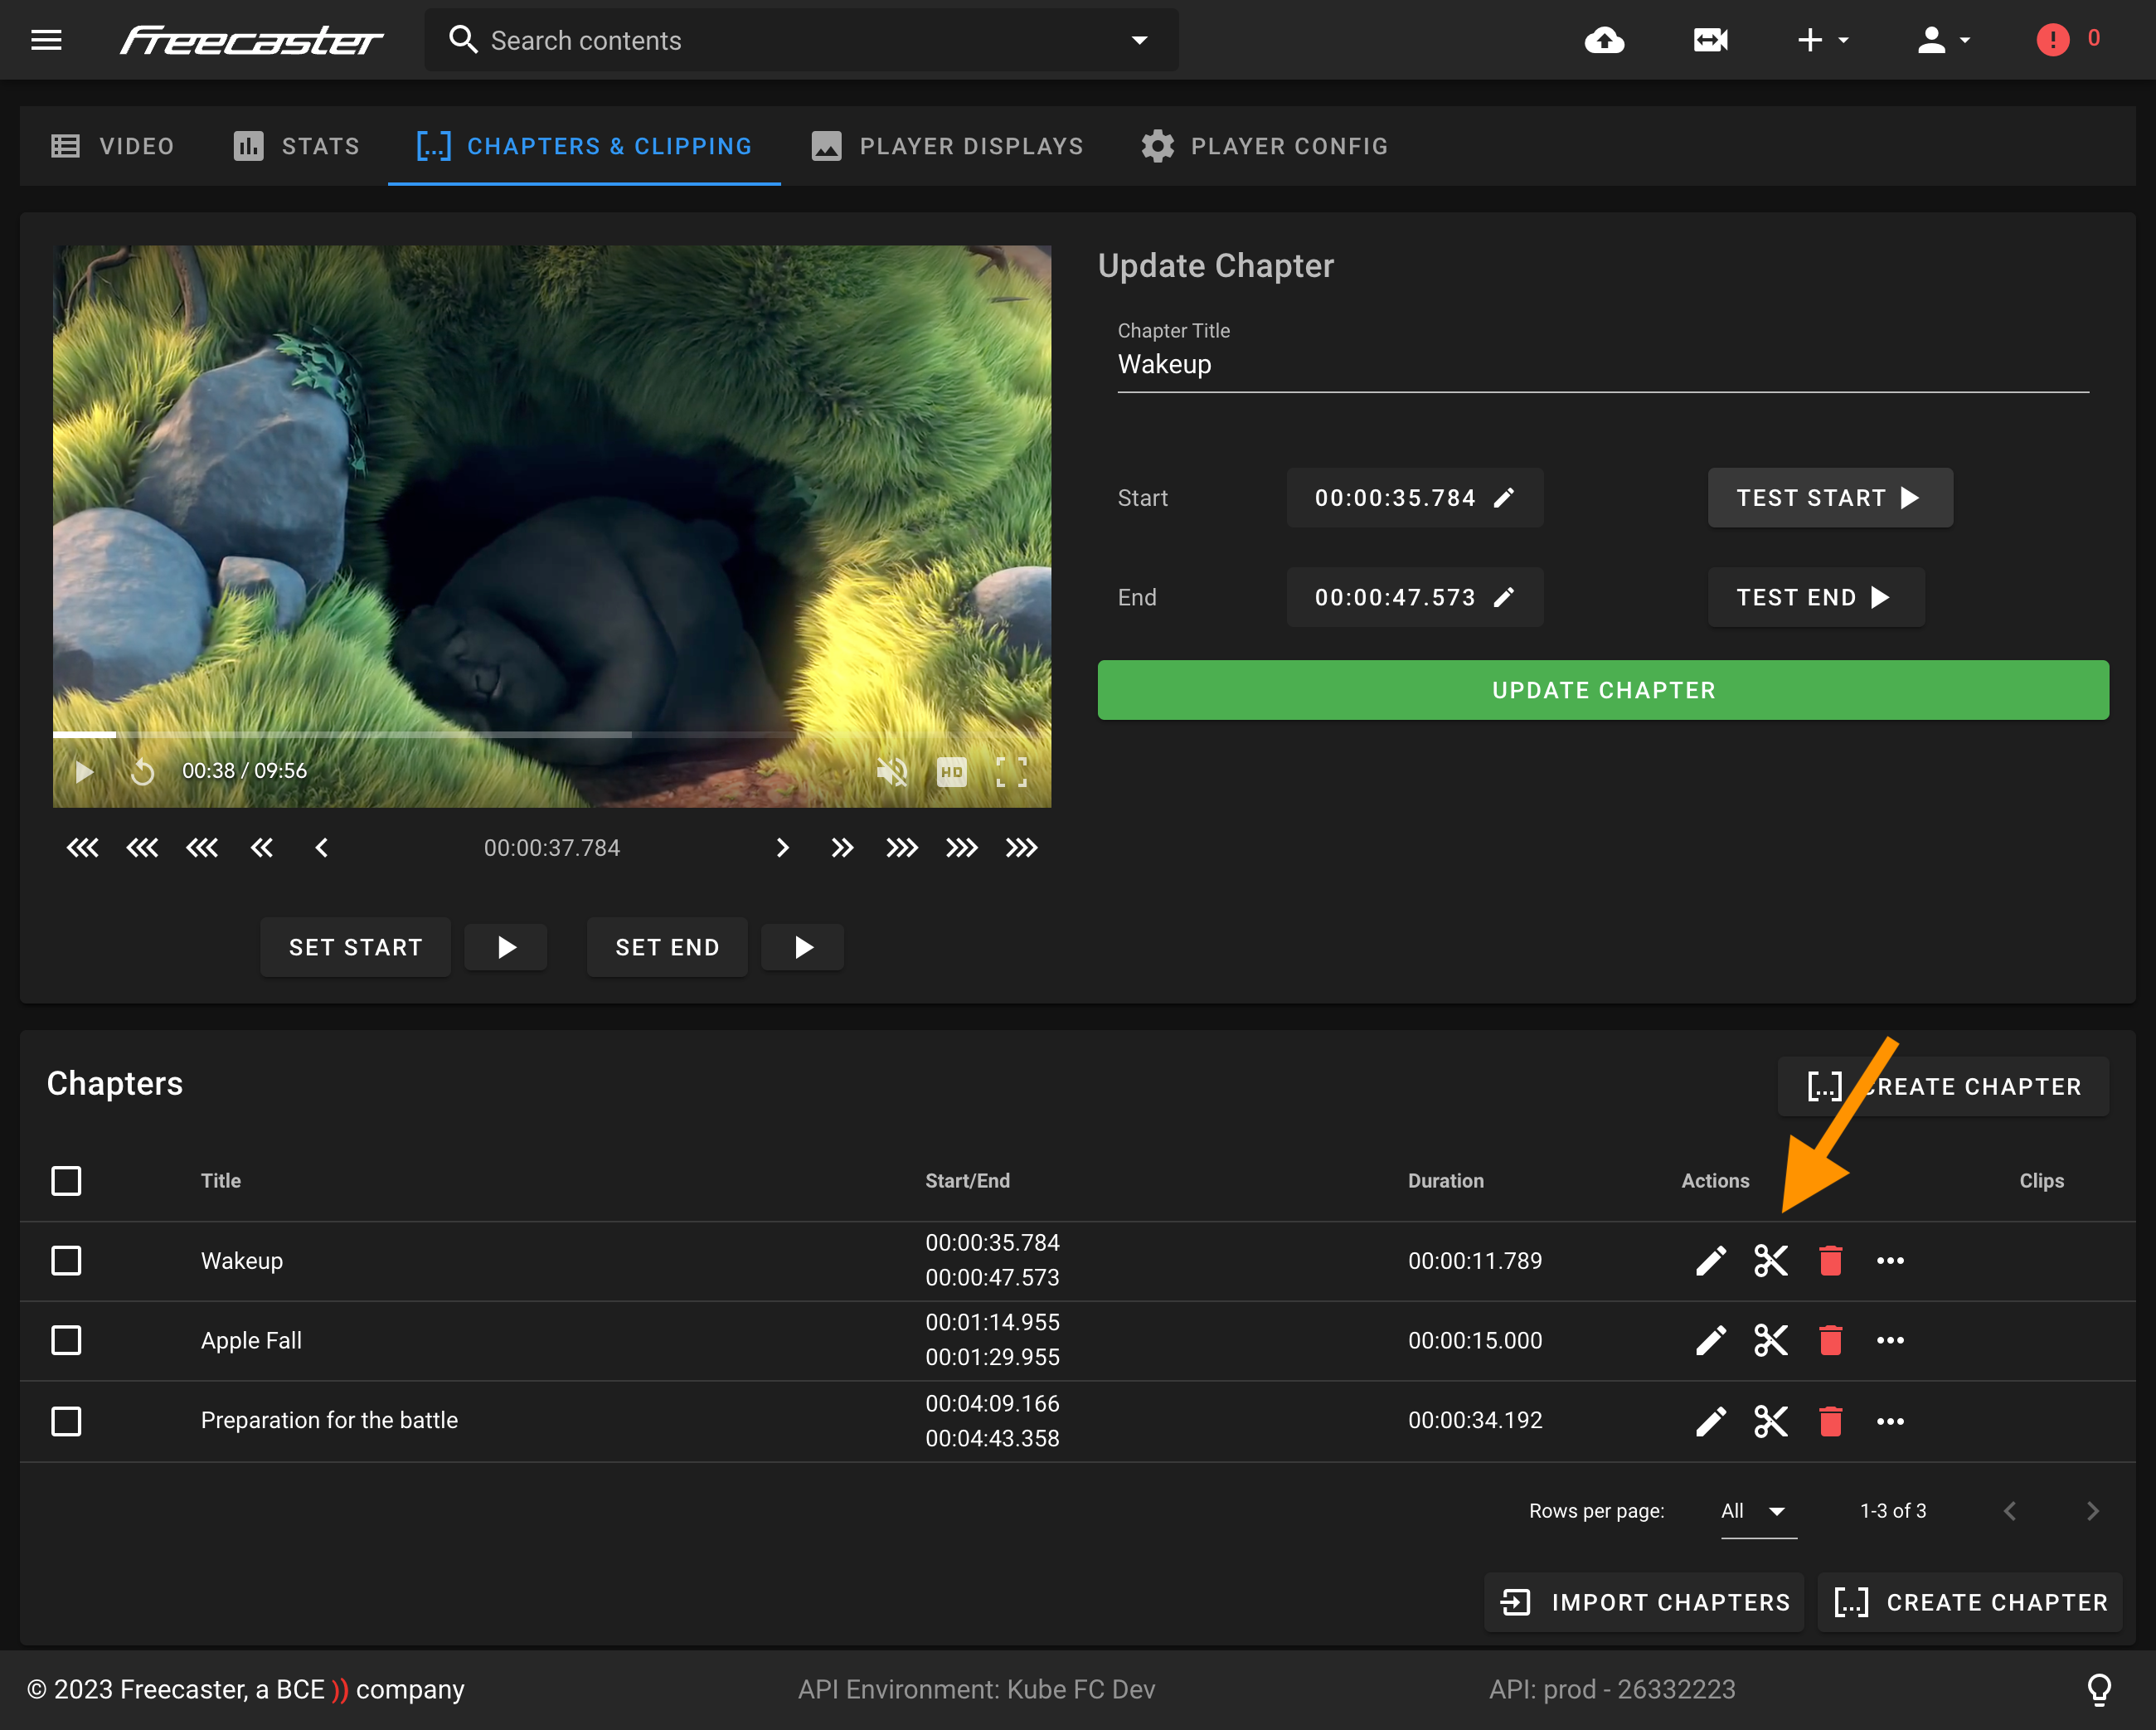
- Click on the "Chapters & Clipping" tab
- Locate the chapter you want to create a clip from in the list of chapters.
- Click on the Clip action button in the actions list.
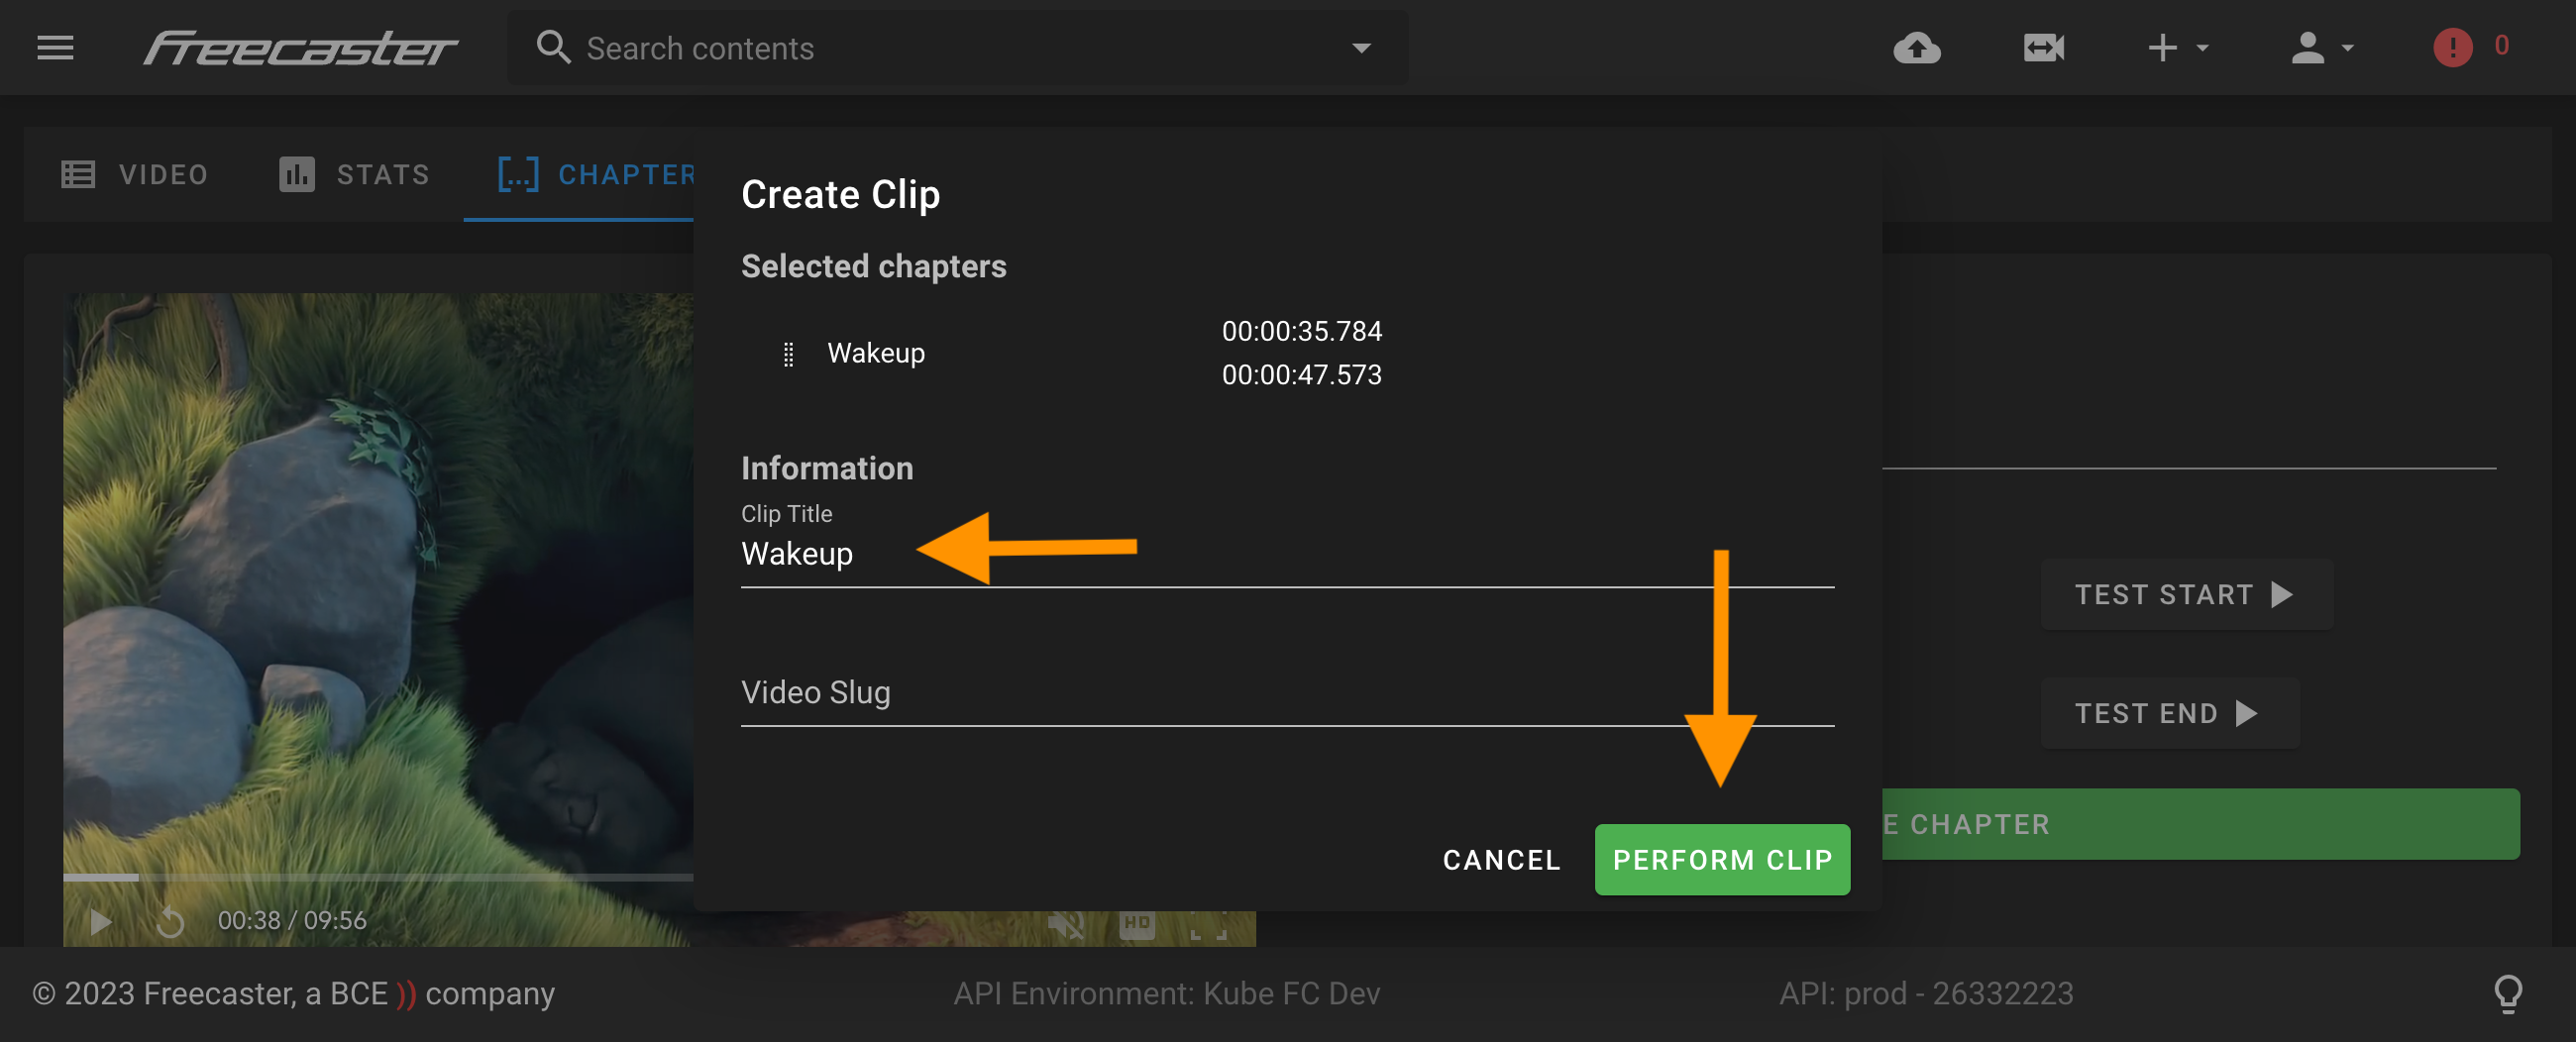
- In the modal that appears, enter a clip title for the clip.
- For videos with multiple audio tracks: you can choose the language(s) you want to include in the clip (one or several)
- Click "Perform Clip" to generate the clip.
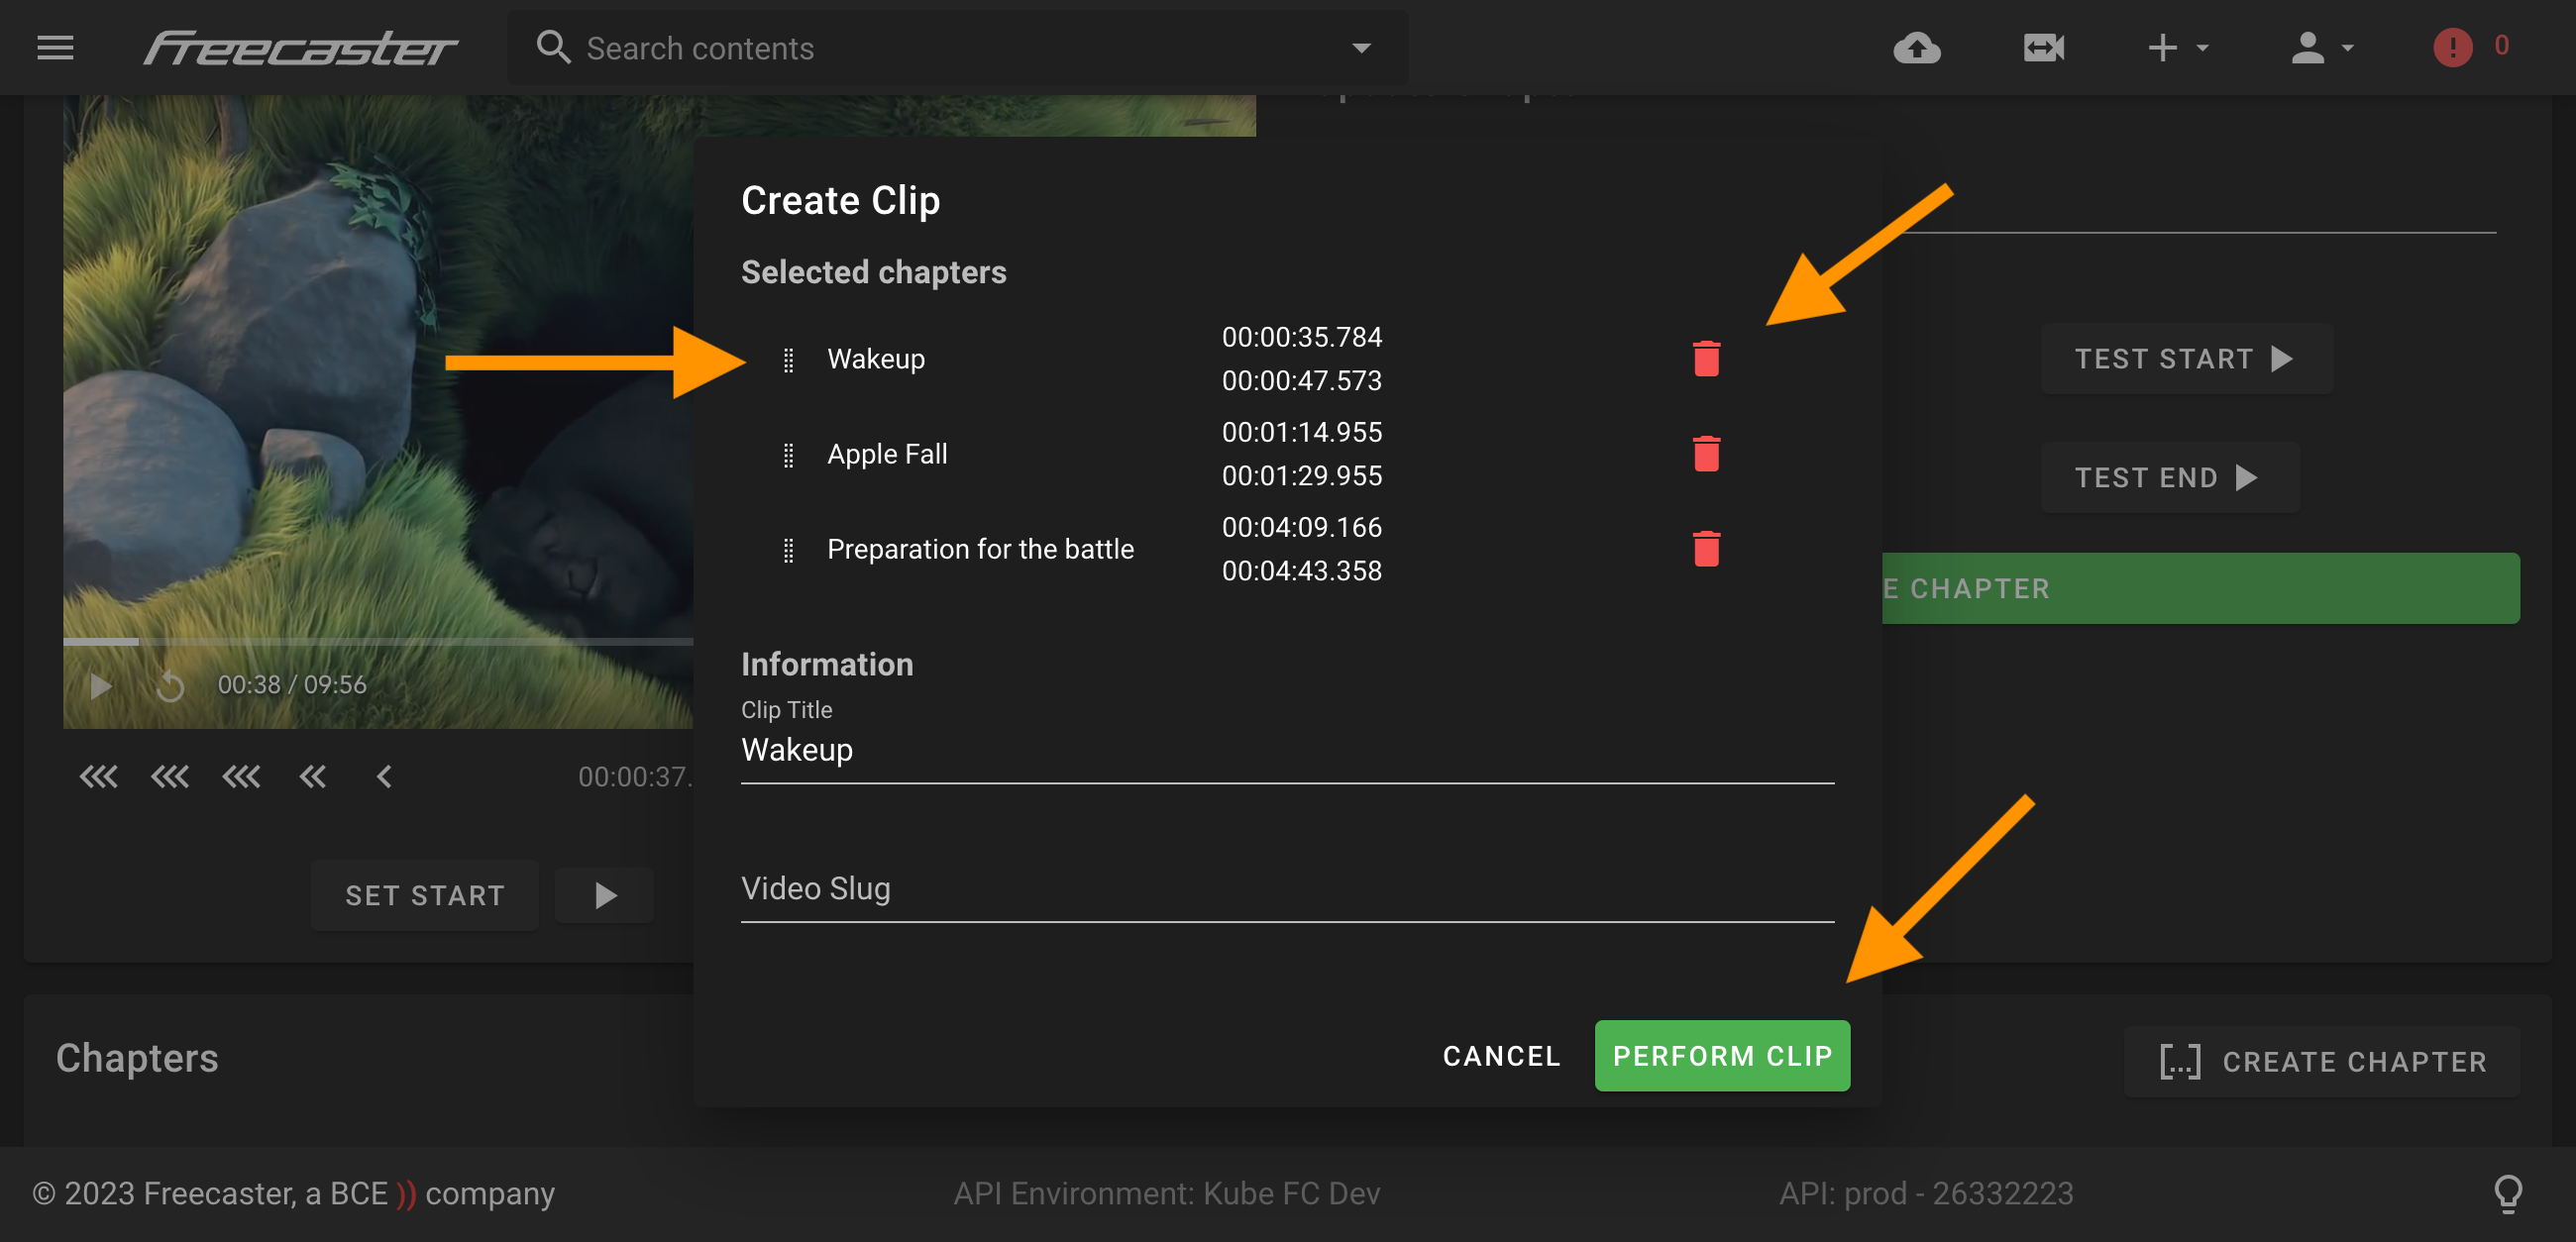
You can also create a clip with several chapters:
- Select the checkbox next to each chapter you want to include
- Clicking on the "Create Clip" button.
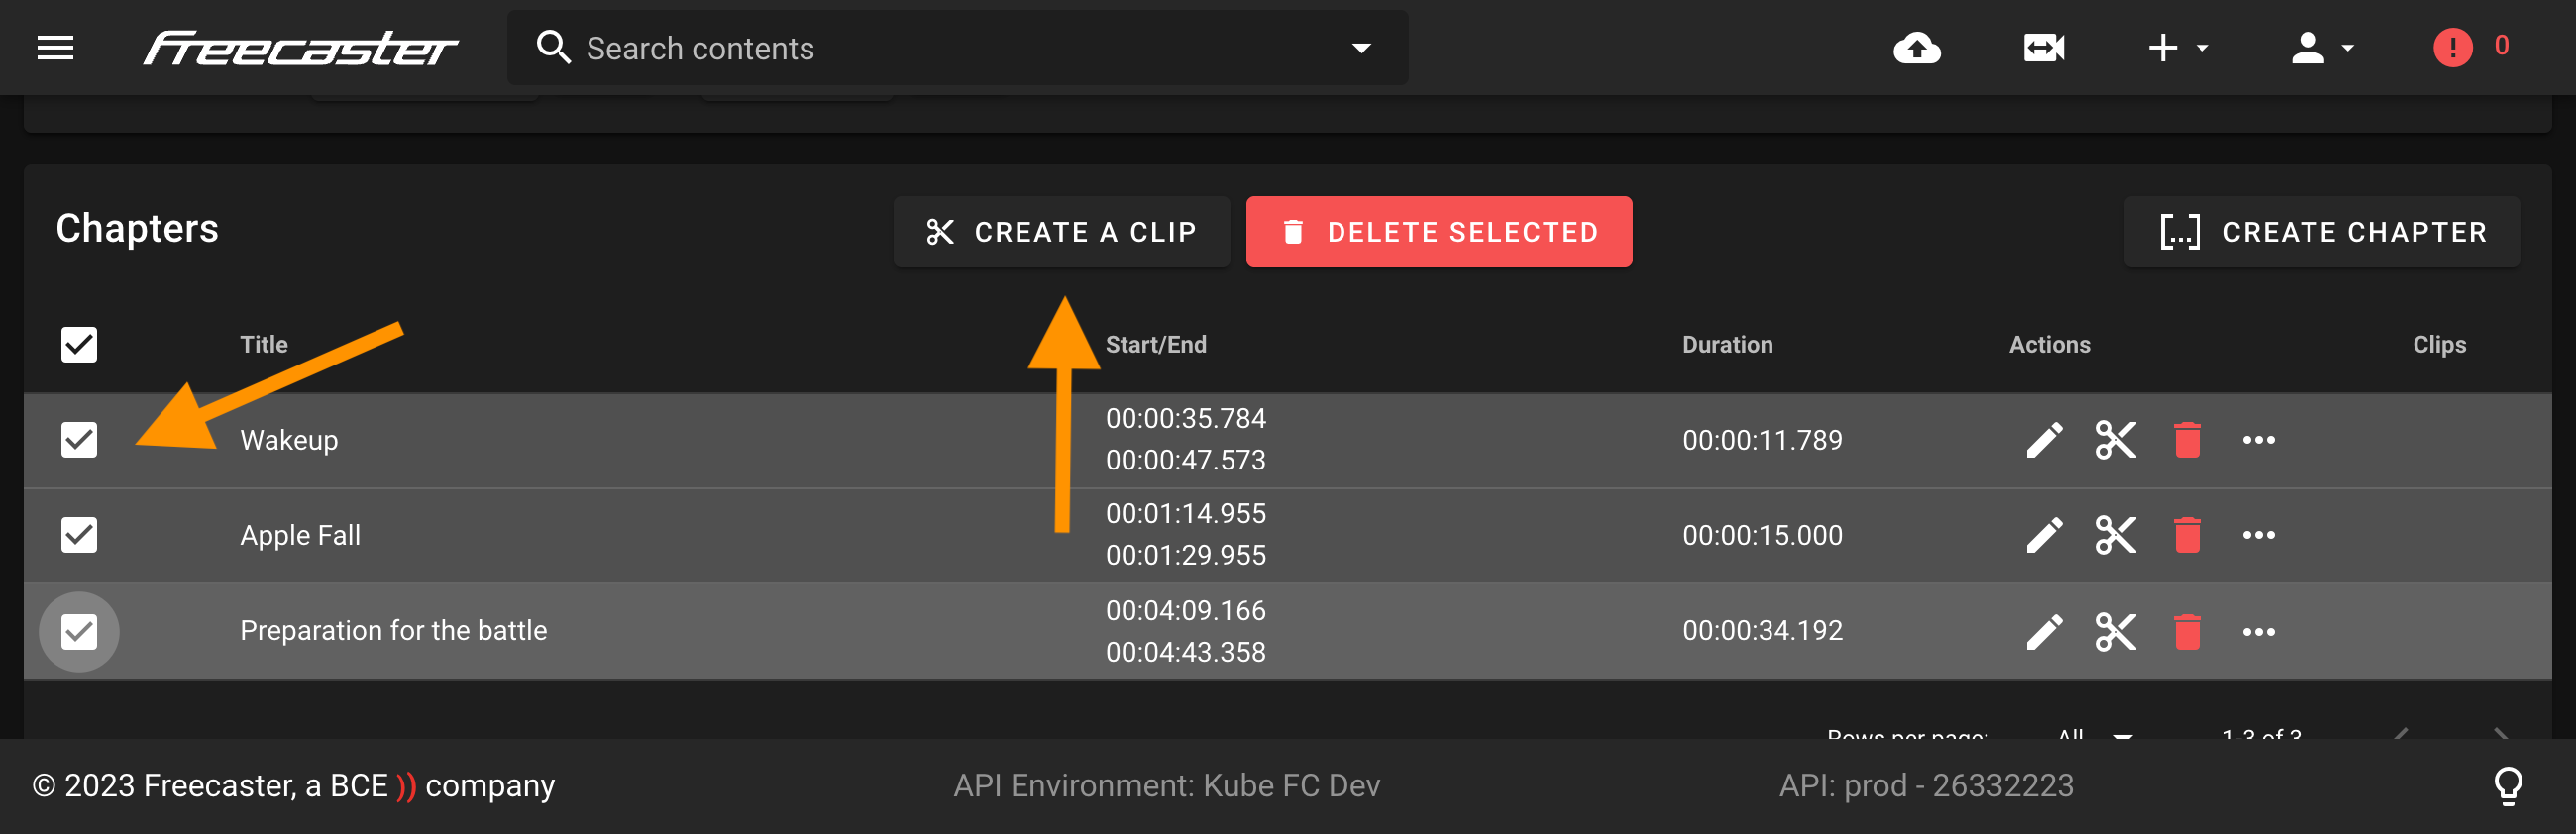
- The “create a clip” modal appears
- Enter a title for the clip.
- You can reorder chapters: simply drag and drop them
- Click "Perform Clip" to generate the clip.
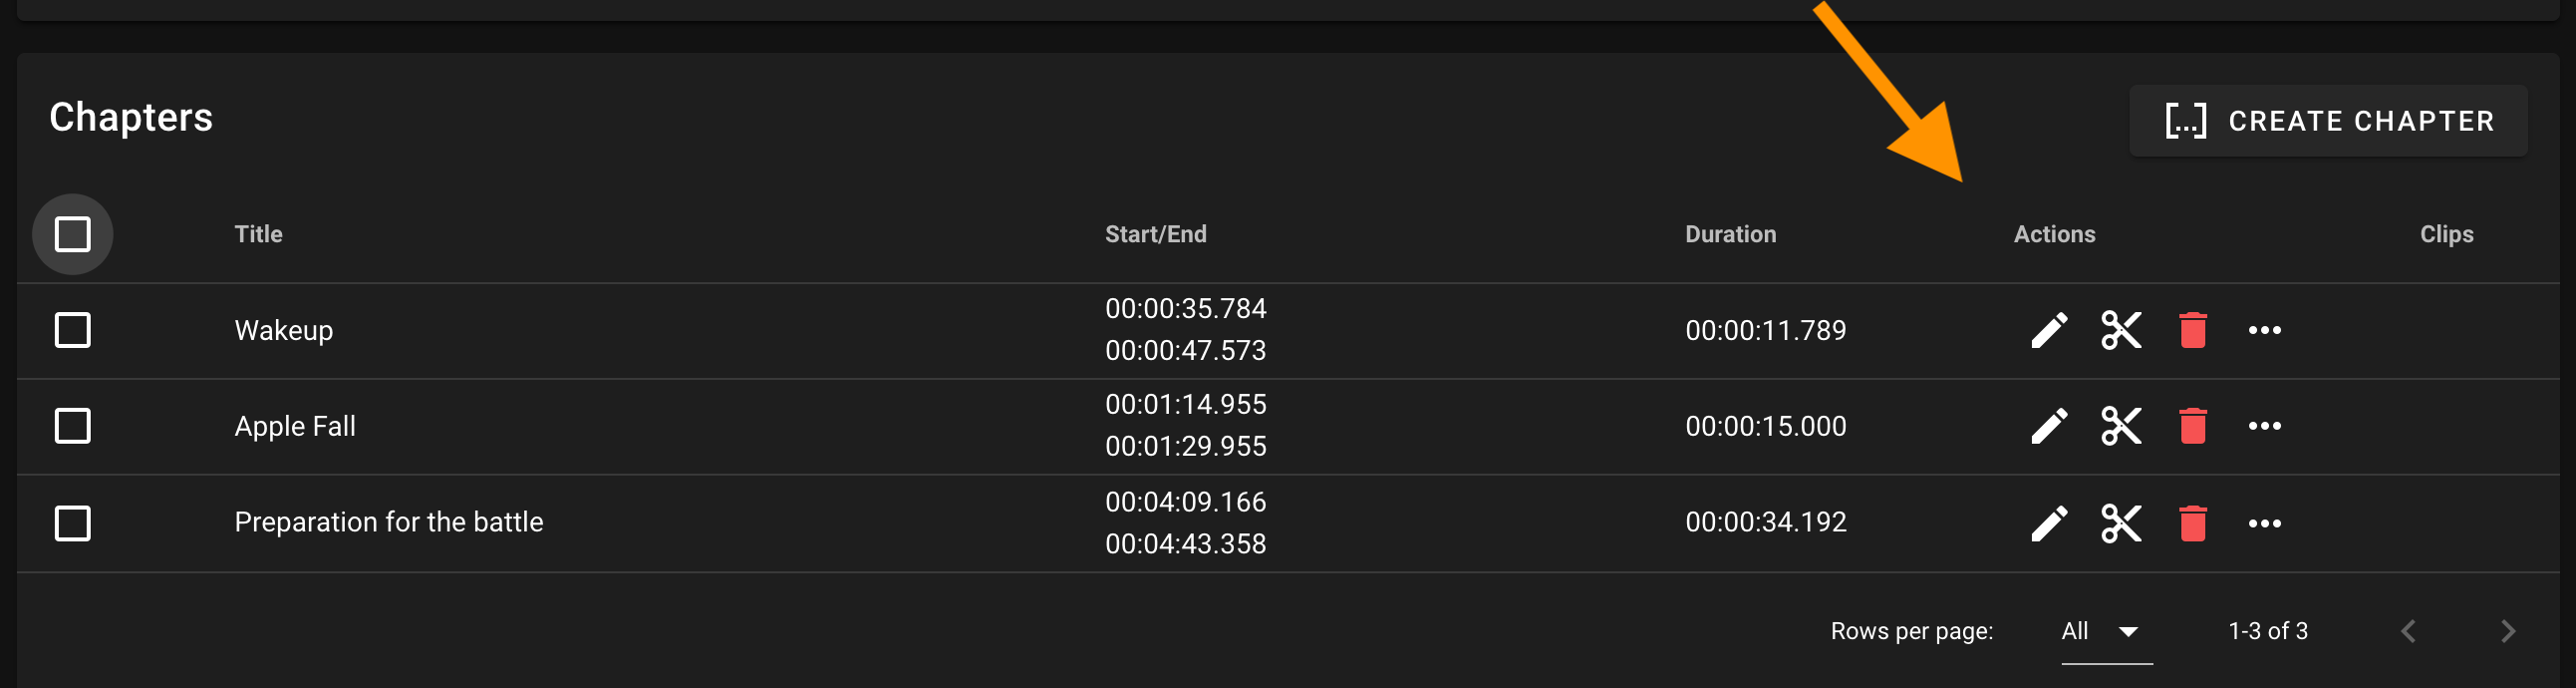
Managing your chapters and clips
Once you've created your video chapters and clips, you can manage them easily within Cockpit. Here are some common tasks you might want to perform:
- Editing a chapter. Click on the "Edit" button in the actions list.
- Deleting a chapter. Click on the "Delete" button in the actions list.
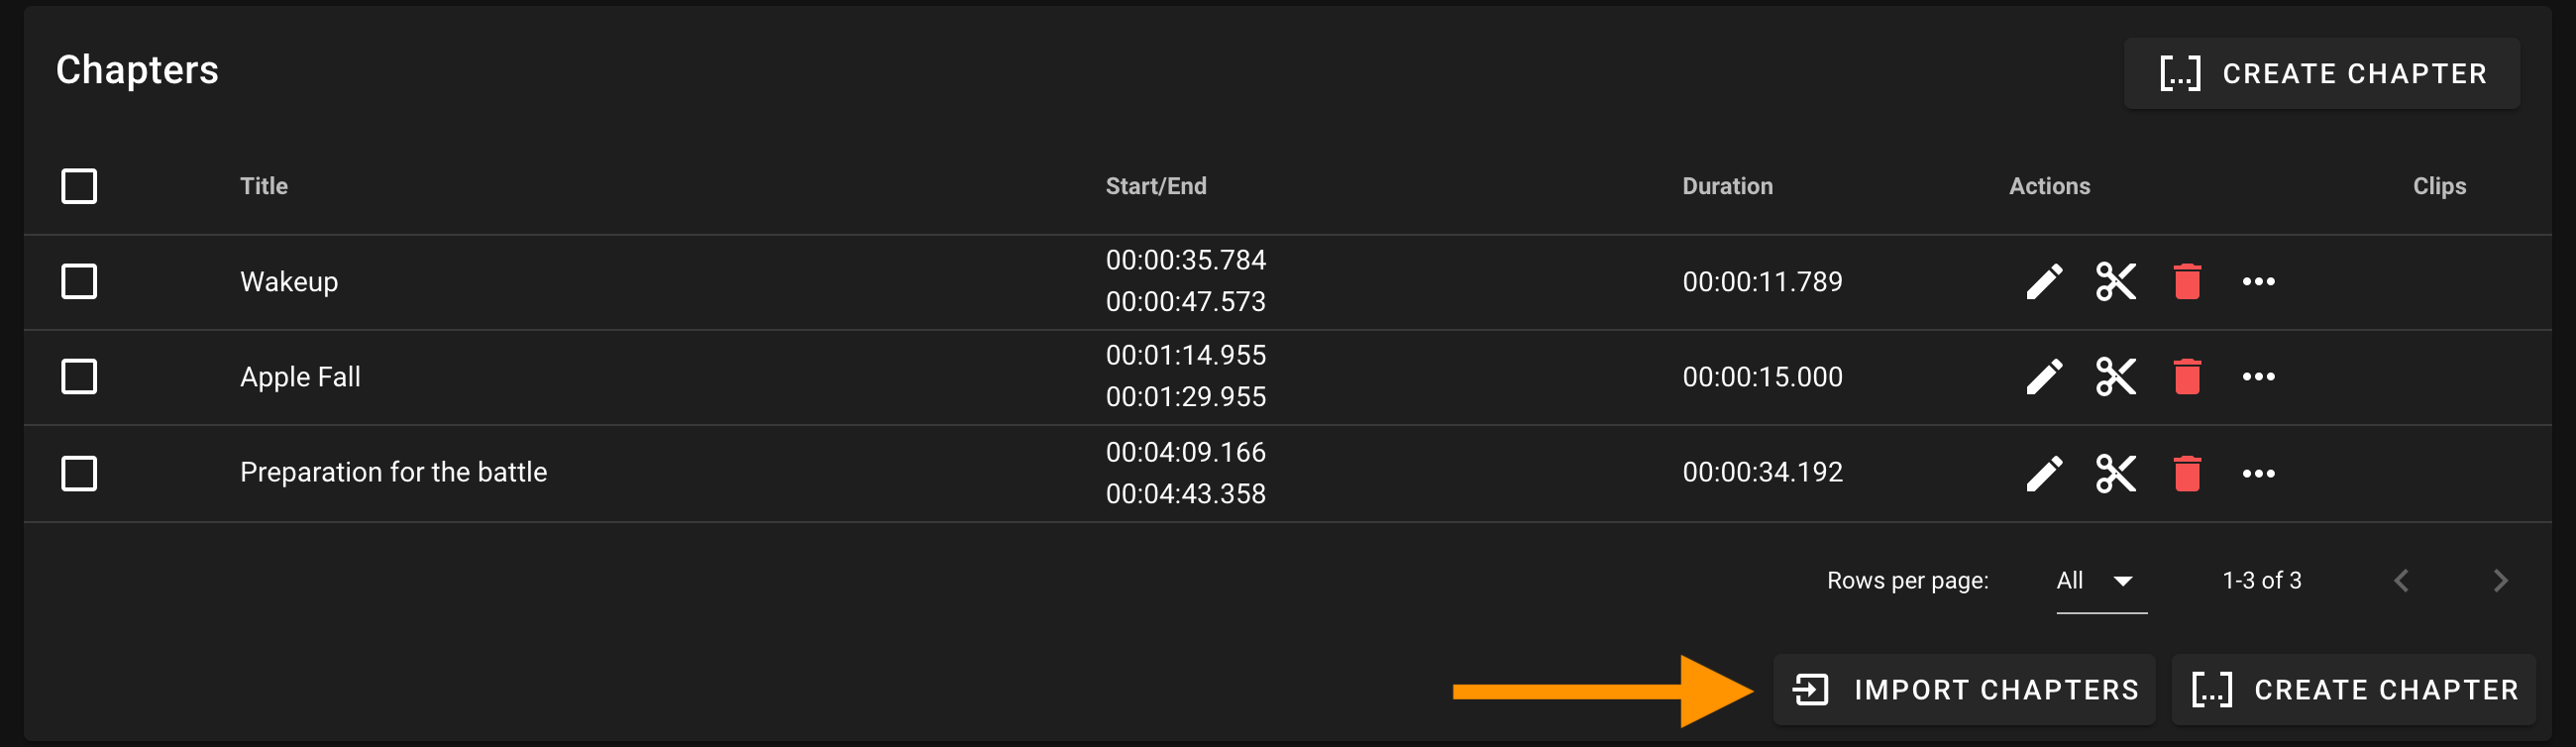
Import Chapters from another video
You can import the chapters from another video. For example, you have created the chapter of a video in landscape (16by9) and you want to import these chapters in the video portrait (9by16) of this video.
- Click on the button import chapters
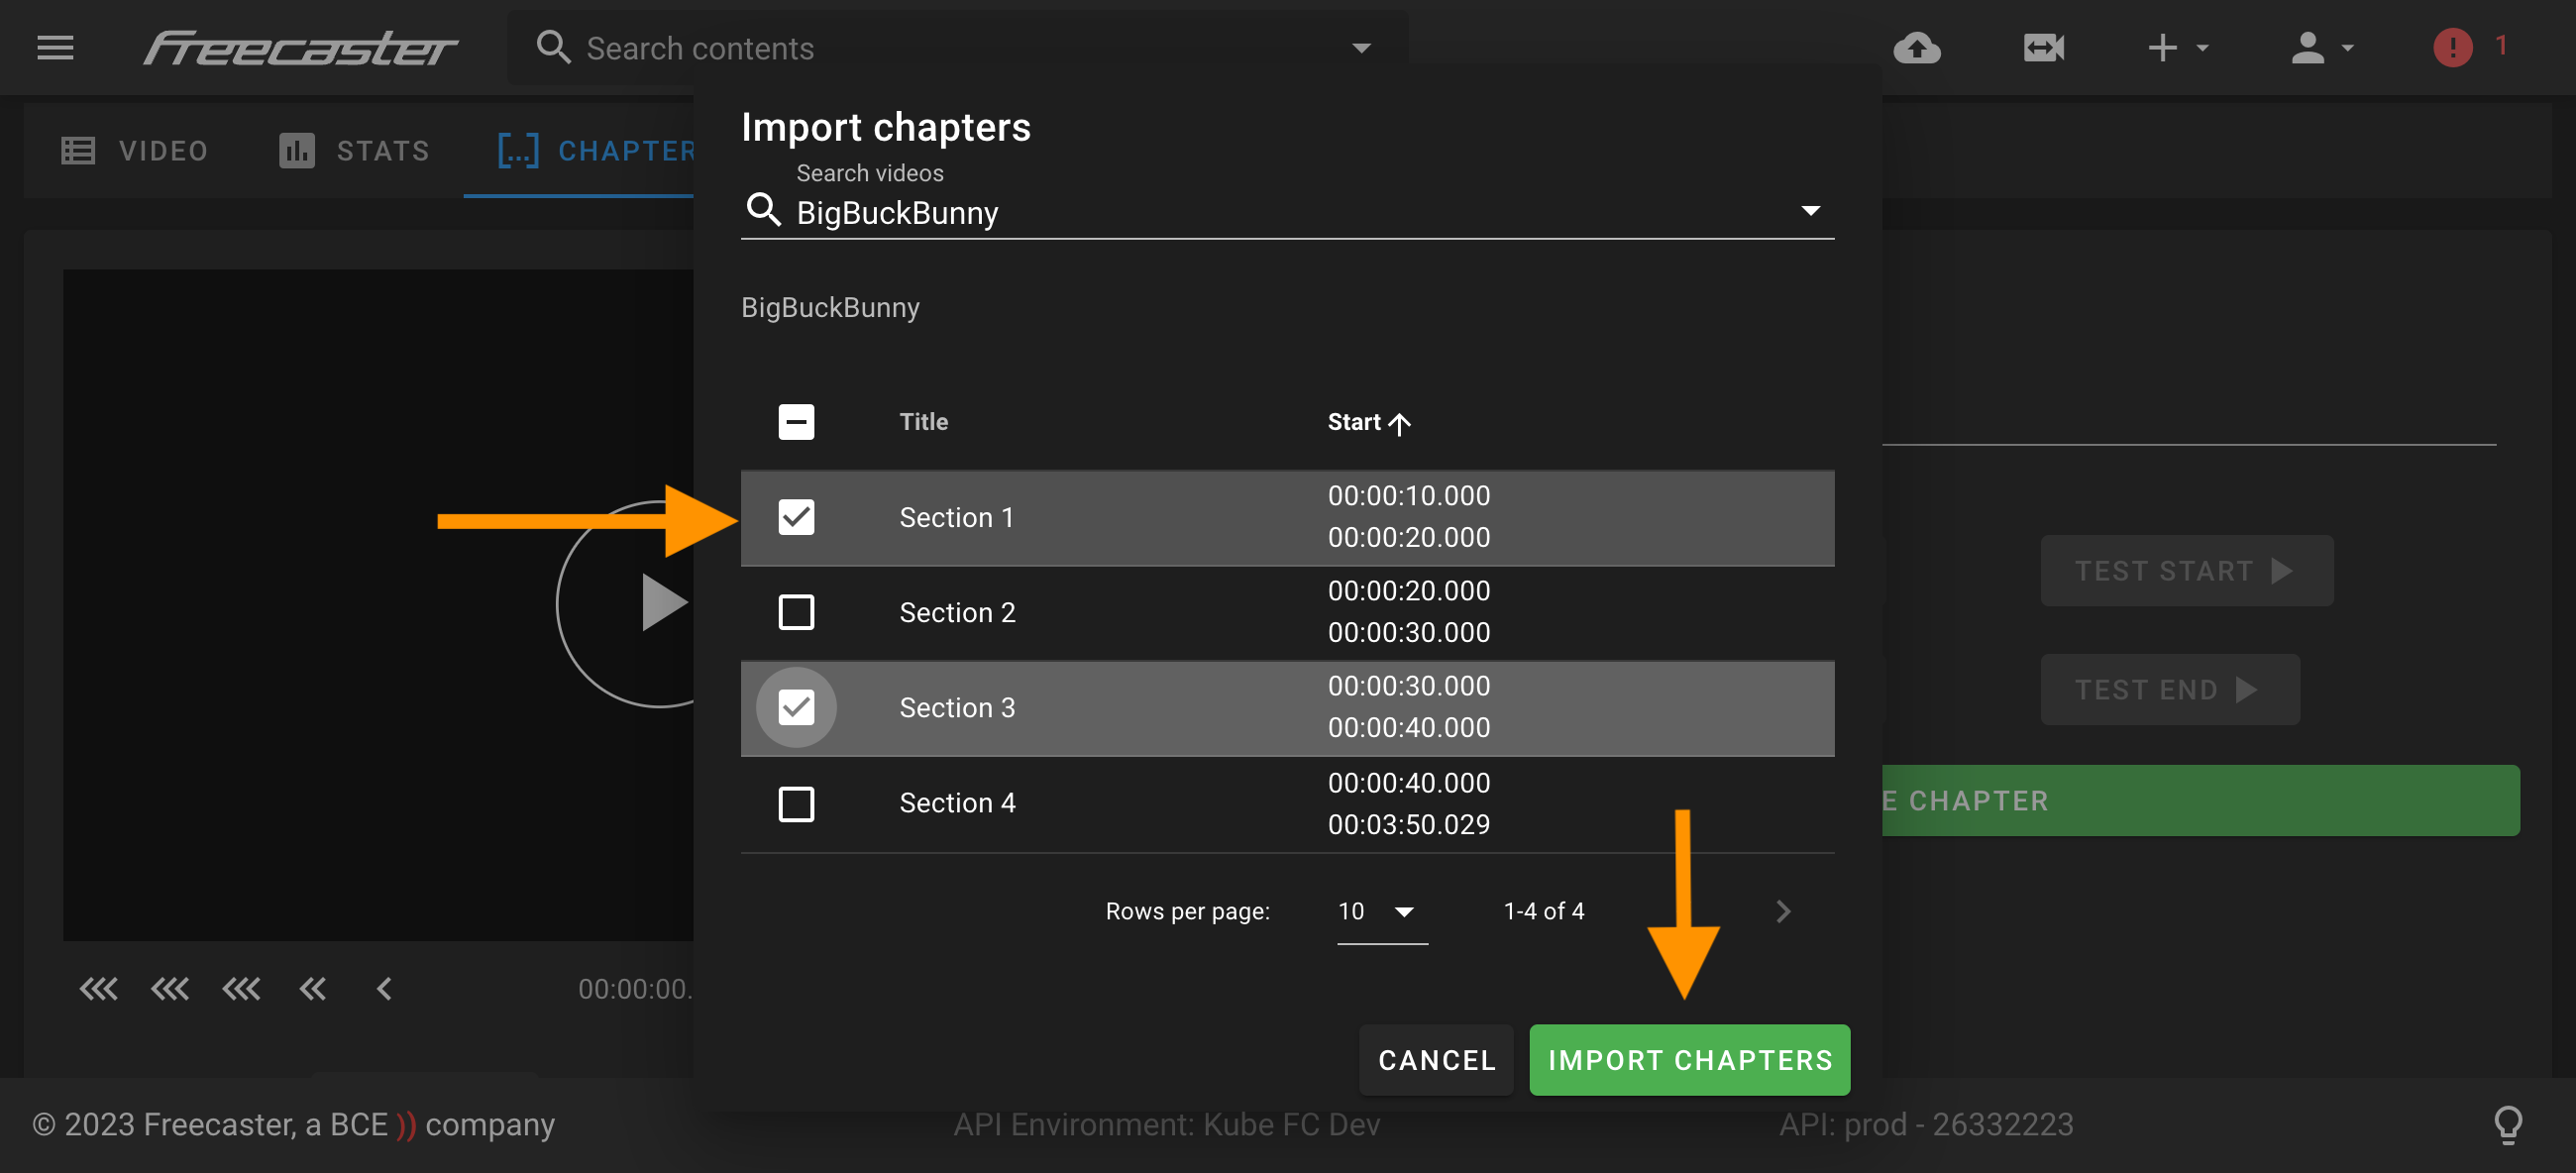
- In the modal, search for the video that contains the chapters you want to import

- You will see the chapter list of the selected video
- Select the chapters you want to import
- Click on “Import Chapters” to import them
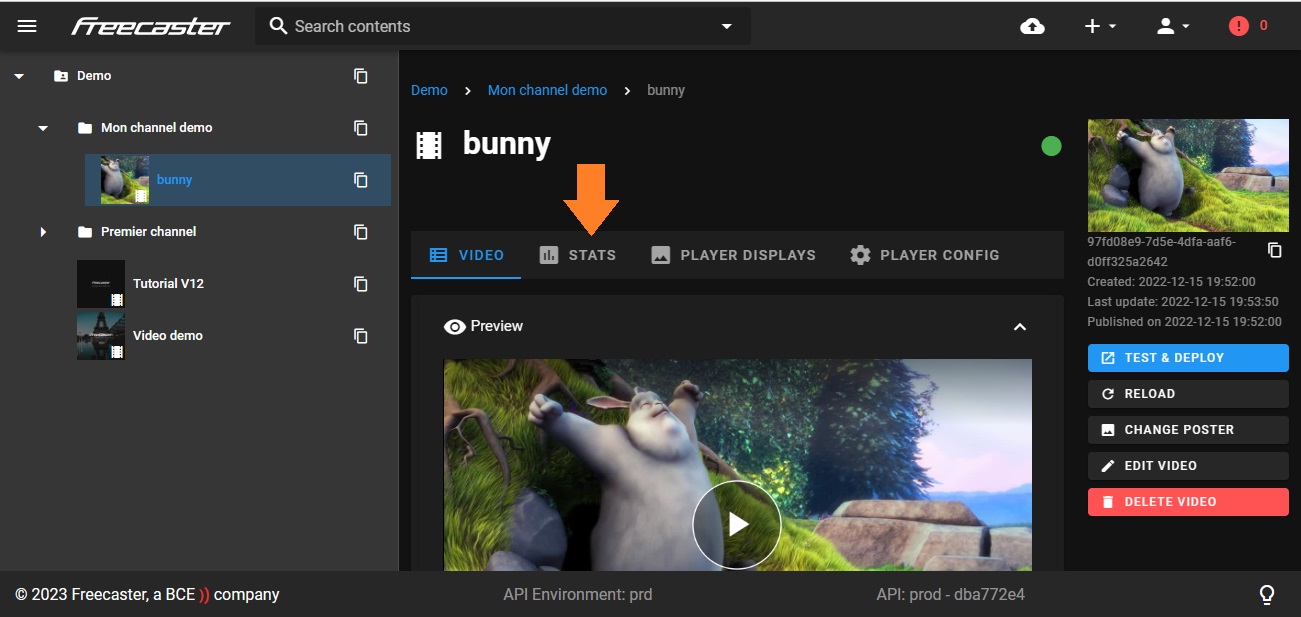
Statistics
- Click on "Stats".
-
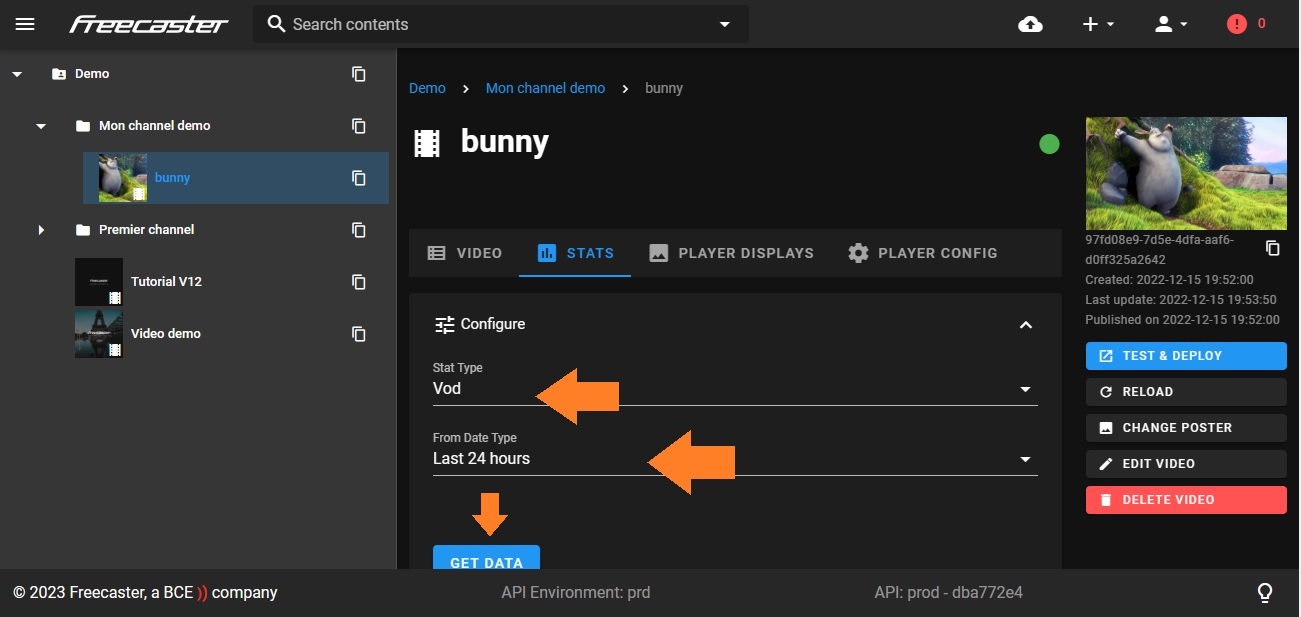
The statistical tool must be entered in "Configure"
-
It is necessary to indicate what is sought in "Stat Type".
-
It is necessary to indicate the period sought in "From Date Type".
-
Click on "Get data".
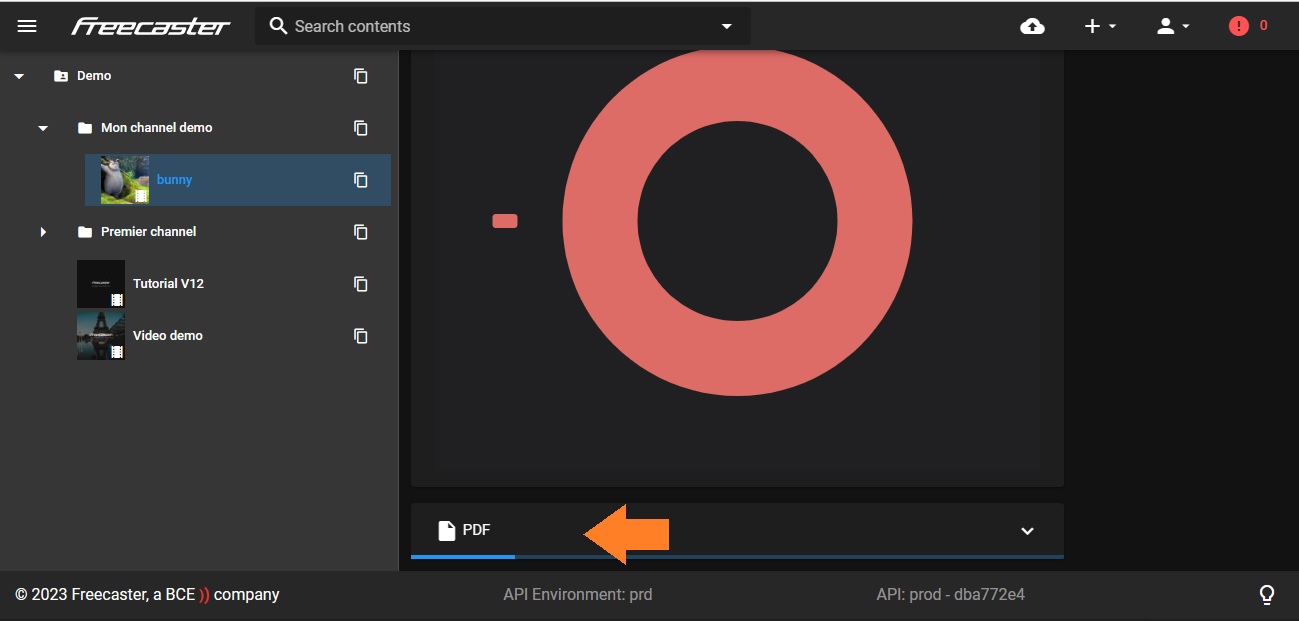
- Graphs will illustrate the results below.
- At the bottom of the list click on "Pdf" to generate and download the relevant statistics report.
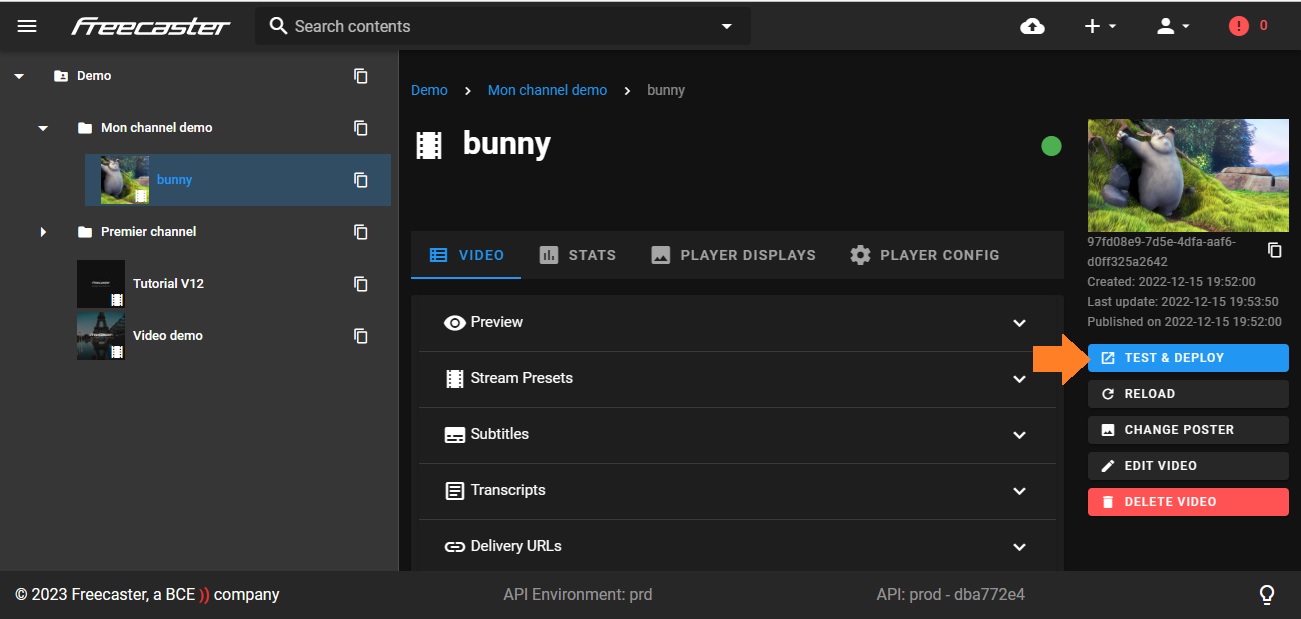
Test and deploy
- Click on "Test & Deploy".
-
The Test & Deploy page allows you to generate a player with modifiable options and the recovery of the associated embedded codes (this page allows you to perform live tests despite the presence of a count-down).
-
This page can be shared internally or with people you deem legitimate, without them needing to have specific access to the platform.
- Be careful not to share this page with third parties.
Access
- Click on "User management"
You can only grant/revoke permissions (roles) your user has access to.
Roles
Here are the different roles you can assign to the users you create.
Warning
You can only assign roles that you have. Make sure to check the roles you are giving to other users.
User Management
- Users : Allows managing user accounts: create, modify, delete, and assign roles.
Warning
The user can only attribute permissions he already has and, to users from the same tenant or below.
Live & Video on Demand
- Live Admin : Full access to manage live events and related content.
- Live Editor : Can edit live content, but cannot delete it.
- Live Viewer : Can view live content only. No edit or delete permissions.
- VOD Admin : Full access to manage VOD content and related assets.
- VOD Editor : Can edit VOD content, but cannot delete it.
- VOD Viewer : Can view VOD content only. No edit or delete permissions.
- Clipping : Grants access to clips and chapters creation and management, for live and VOD.
Info
To edit the VOD generated from clips, the user also needs Live Editor or VOD Editor permissions.
Analytics
- Stats Viewer : Allows access to video or tenant statistics, and export it as PDF reports.
Others
- Cockpit : Allow the access to the cockpit.
Info
This role is not required for API access, any valid account can use the API. However, specific actions still require appropriate roles.